
Thank you so much for stopping by! If you arrived here via Pinterest or another site, please note that this post has been updated as of June, 2014 in order to showcase our NEW calendar pages! The post below will highlight some of the great features of our X-Small Planner Pages, as well as provide detailed print instructions with screen shots and step-by-step directions.
*******
It is easy to get overwhelmed by all the choices there are for planners these days, especially when it comes to size. Some people prefer the awesome writing space that our Large 8.5 x 11" planner pages offer, while others prefer the portability of our Small 5.5 x 8.5" planner pages. But if you are someone that does not carry a work bag or tote every day, even our Small planner can be bit big to carry around with you.
Just last year, my mom and I were introduced to the Filofax Personal & Compact size, as well as the Daytimer Portable, with inserts measuring 3.75 x 6.75". My mom purchased a Filofax Personal size off eBay just to give it a try, and it was love at first sight. The pages have enough space for her to write what she wants and it's portable enough to carry with her in her purse.
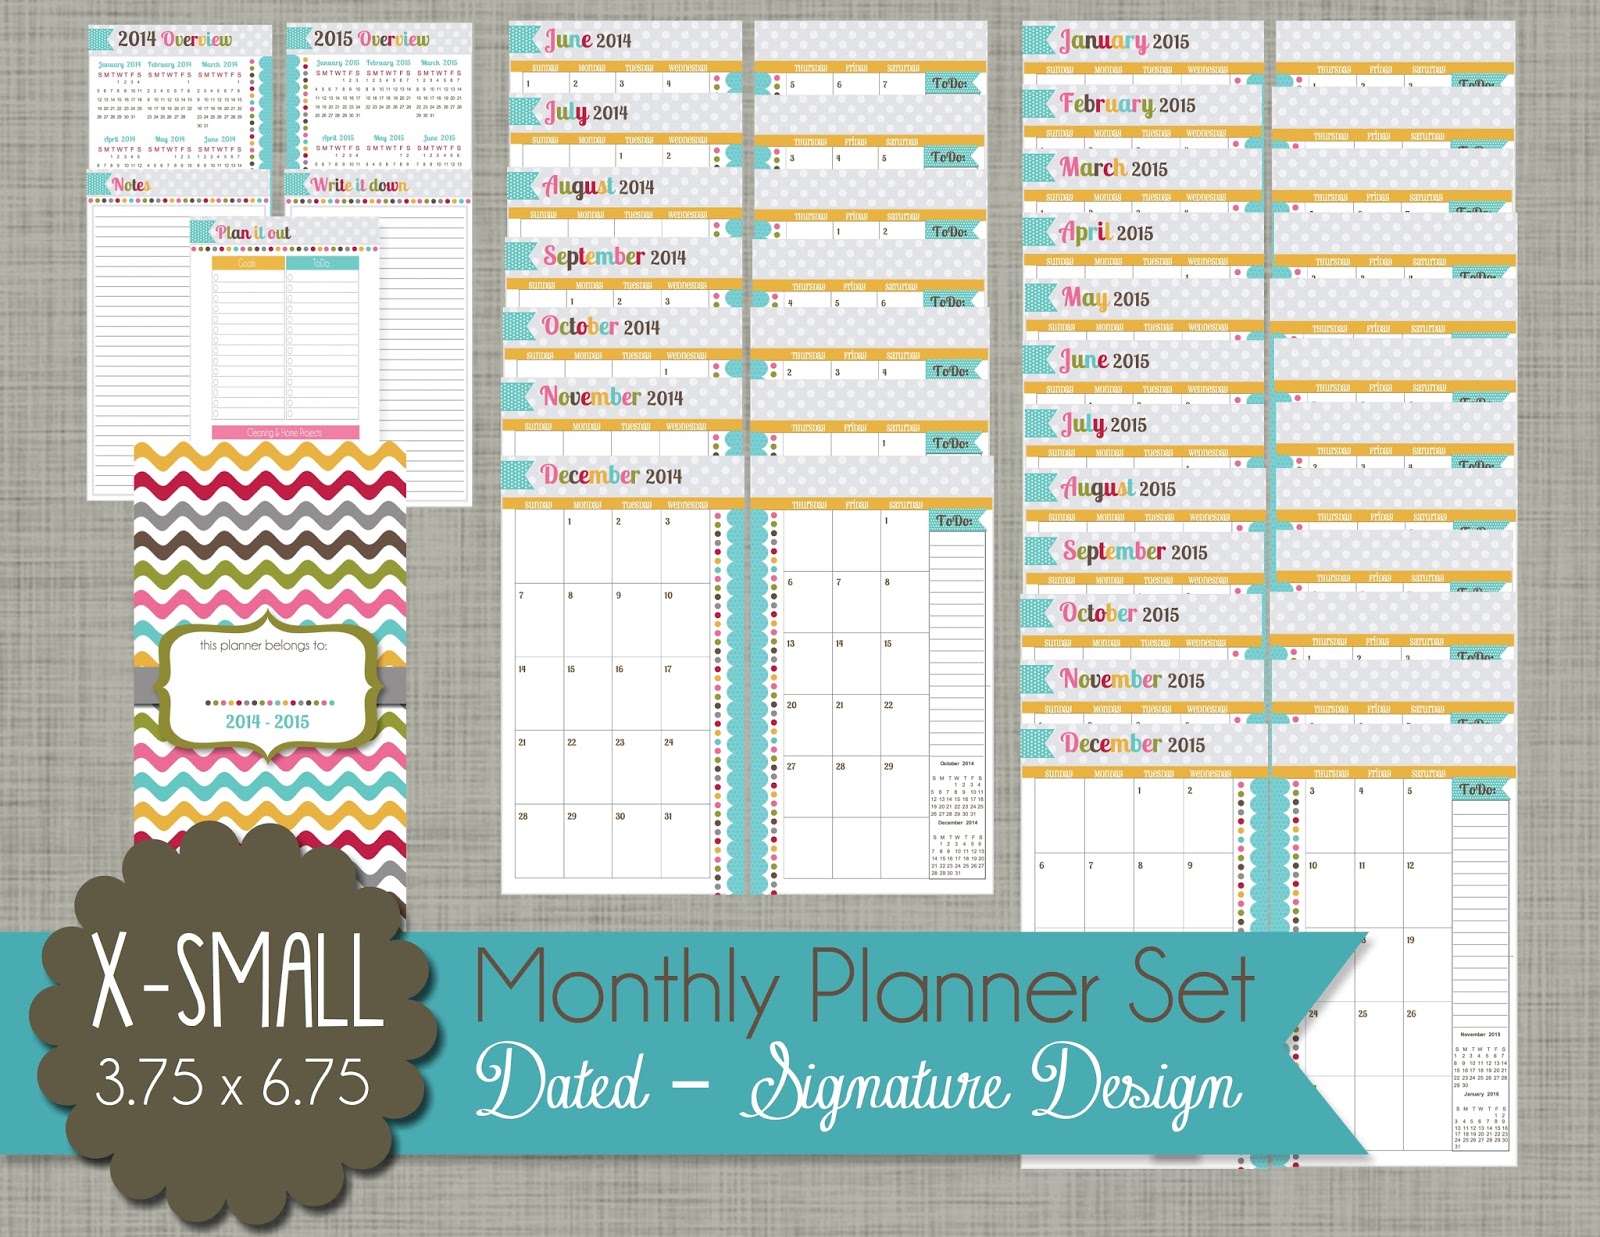
We knew this size would be a big hit for those planner junkies looking for a more portable planner option, so we added it to the shop!! We now have several sets to choose from in X-Small (3.75 x 6.75). Of course we have our popular Seasonal Planner Set.


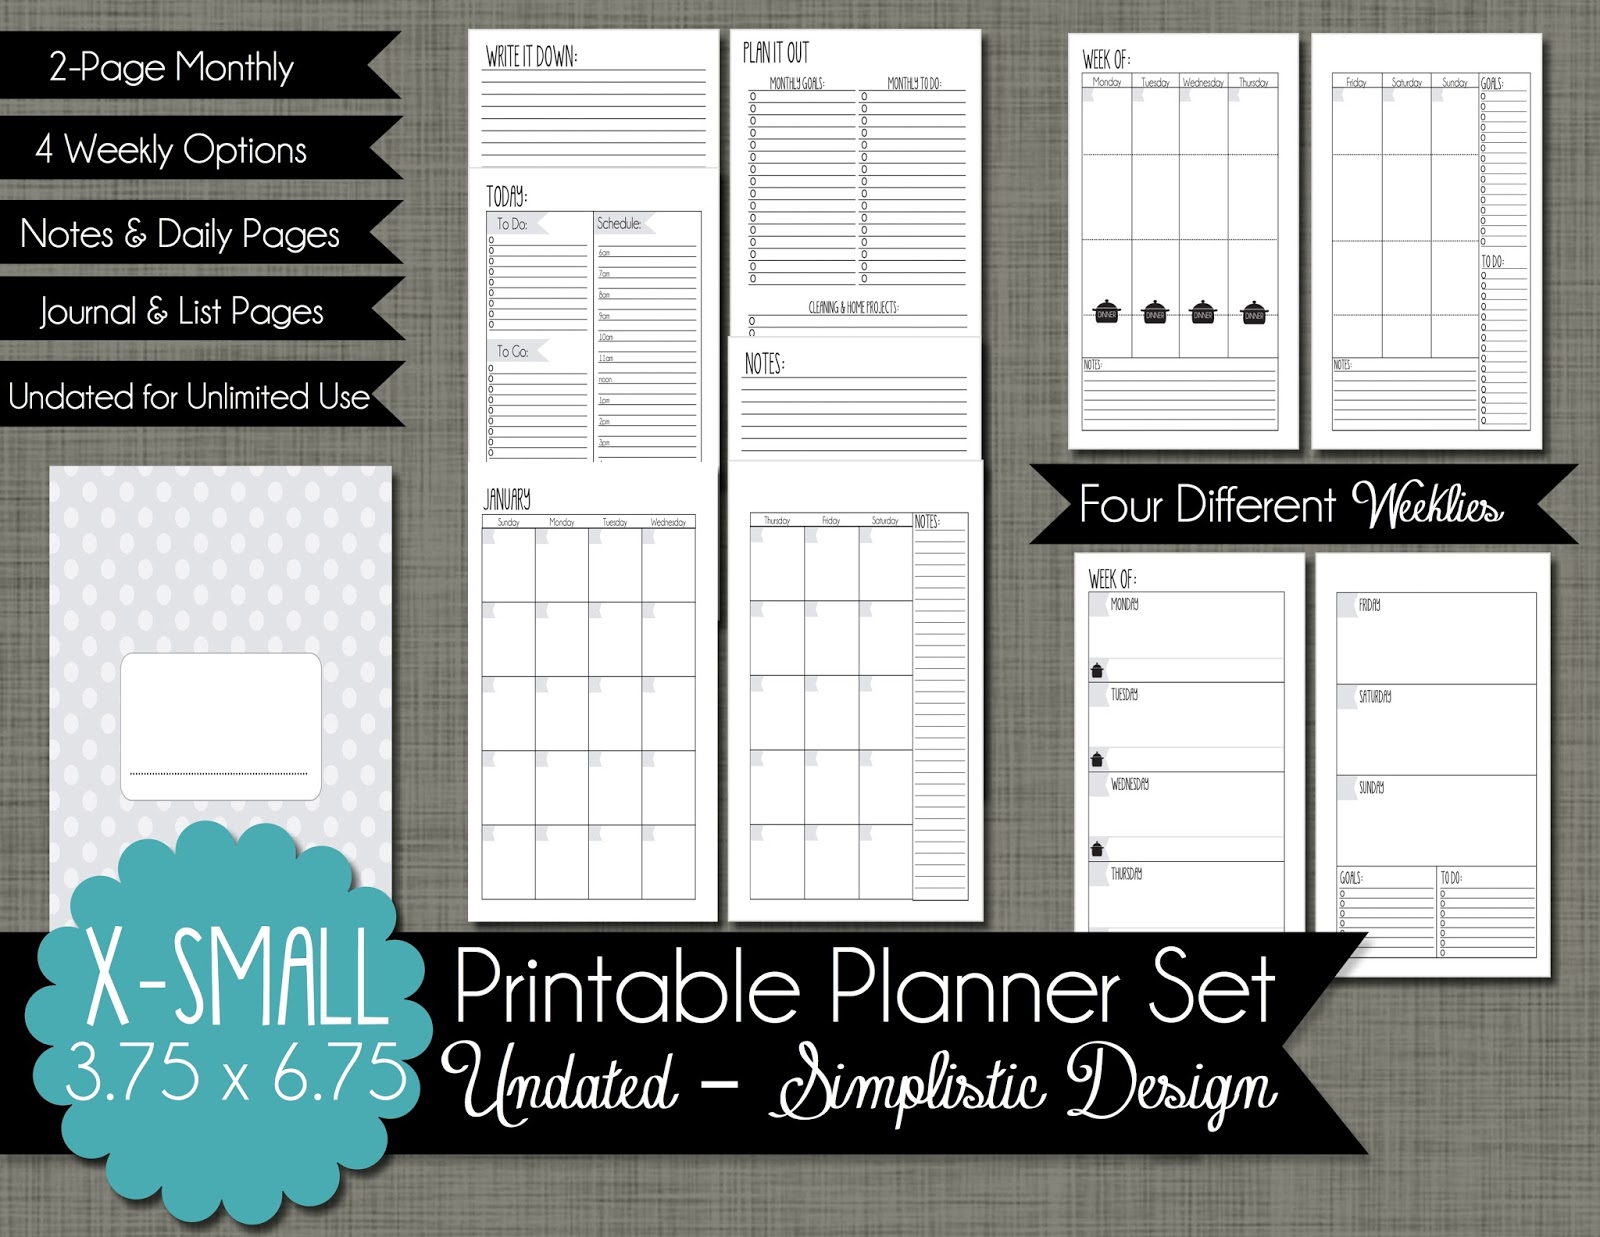
And our Undated Simplistic Set
HOW TO PRINT OUR X-SMALL PLANNER PAGES
The great thing about our X-Small planner pages is the amount of flexibility it offers. But with that flexibility comes a more time consuming print process. Printing and setting up your planner will be a project, but we promise that it will be worth the effort to have a planner that meets all of your needs :-)
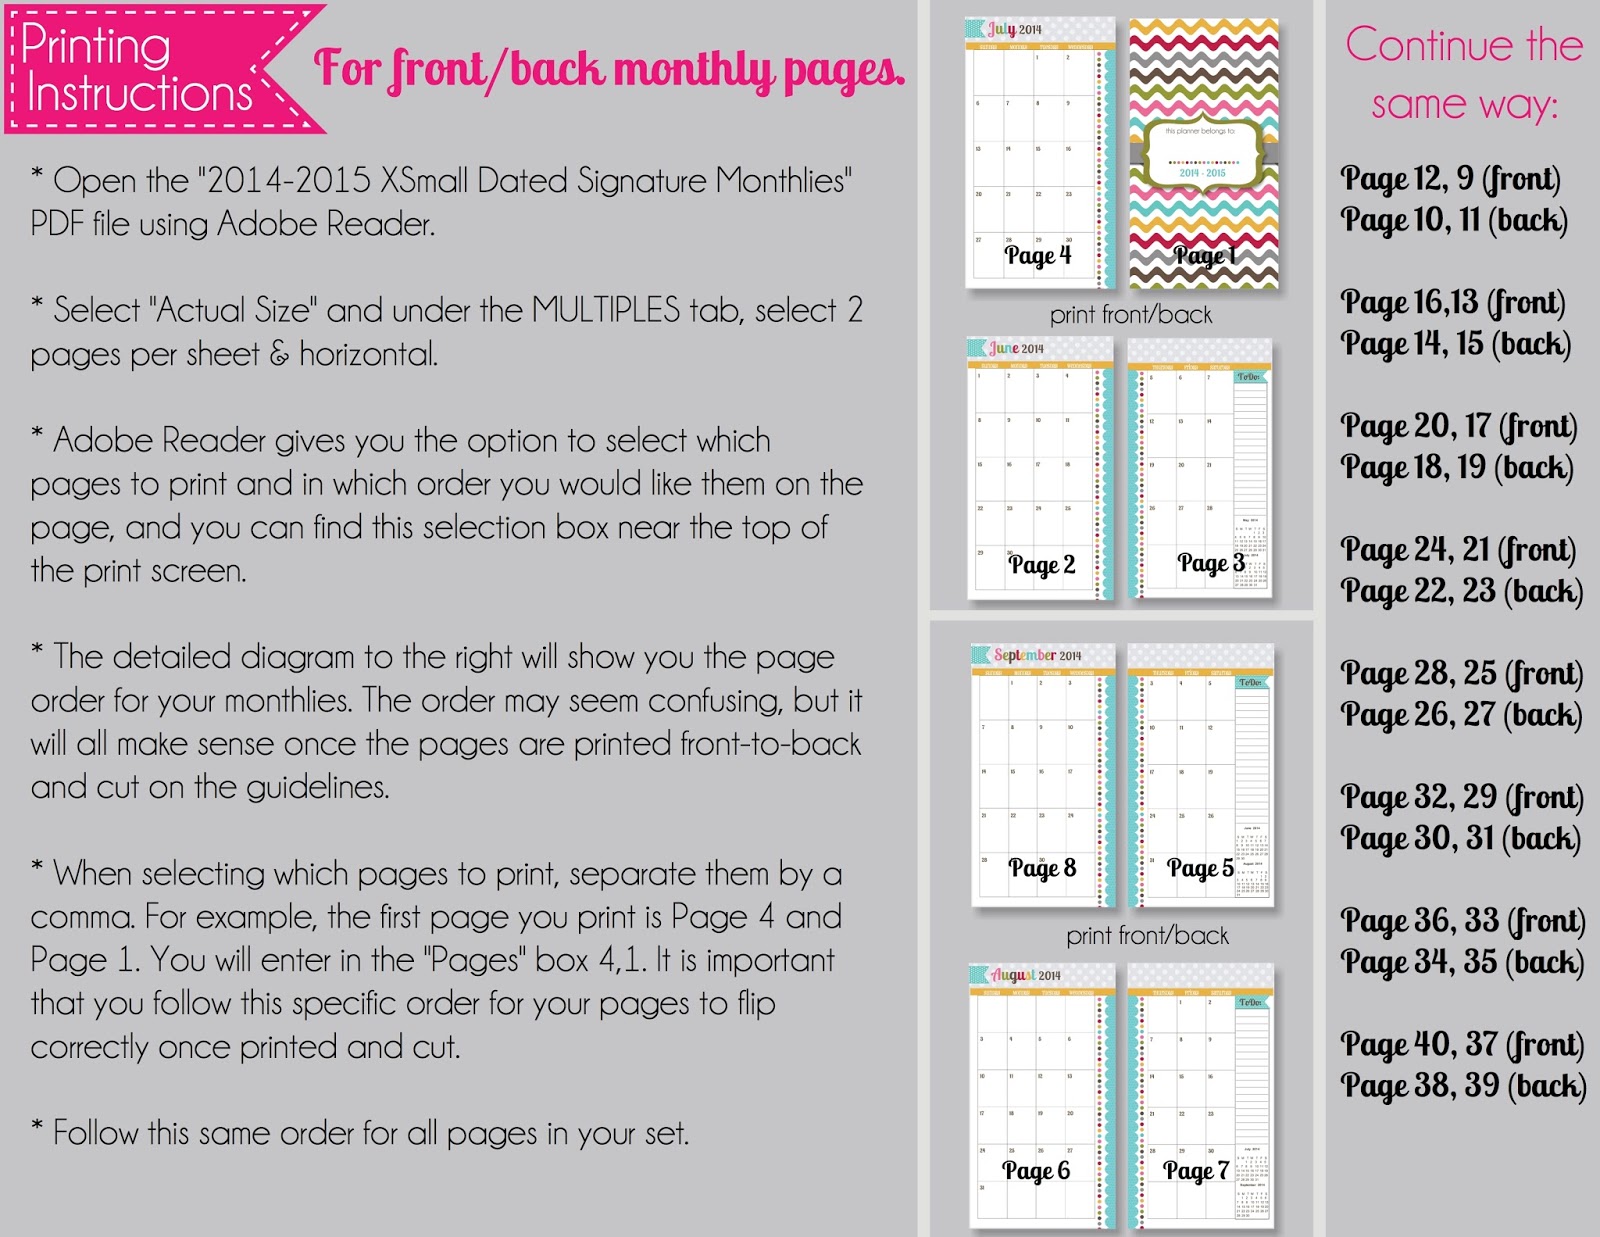
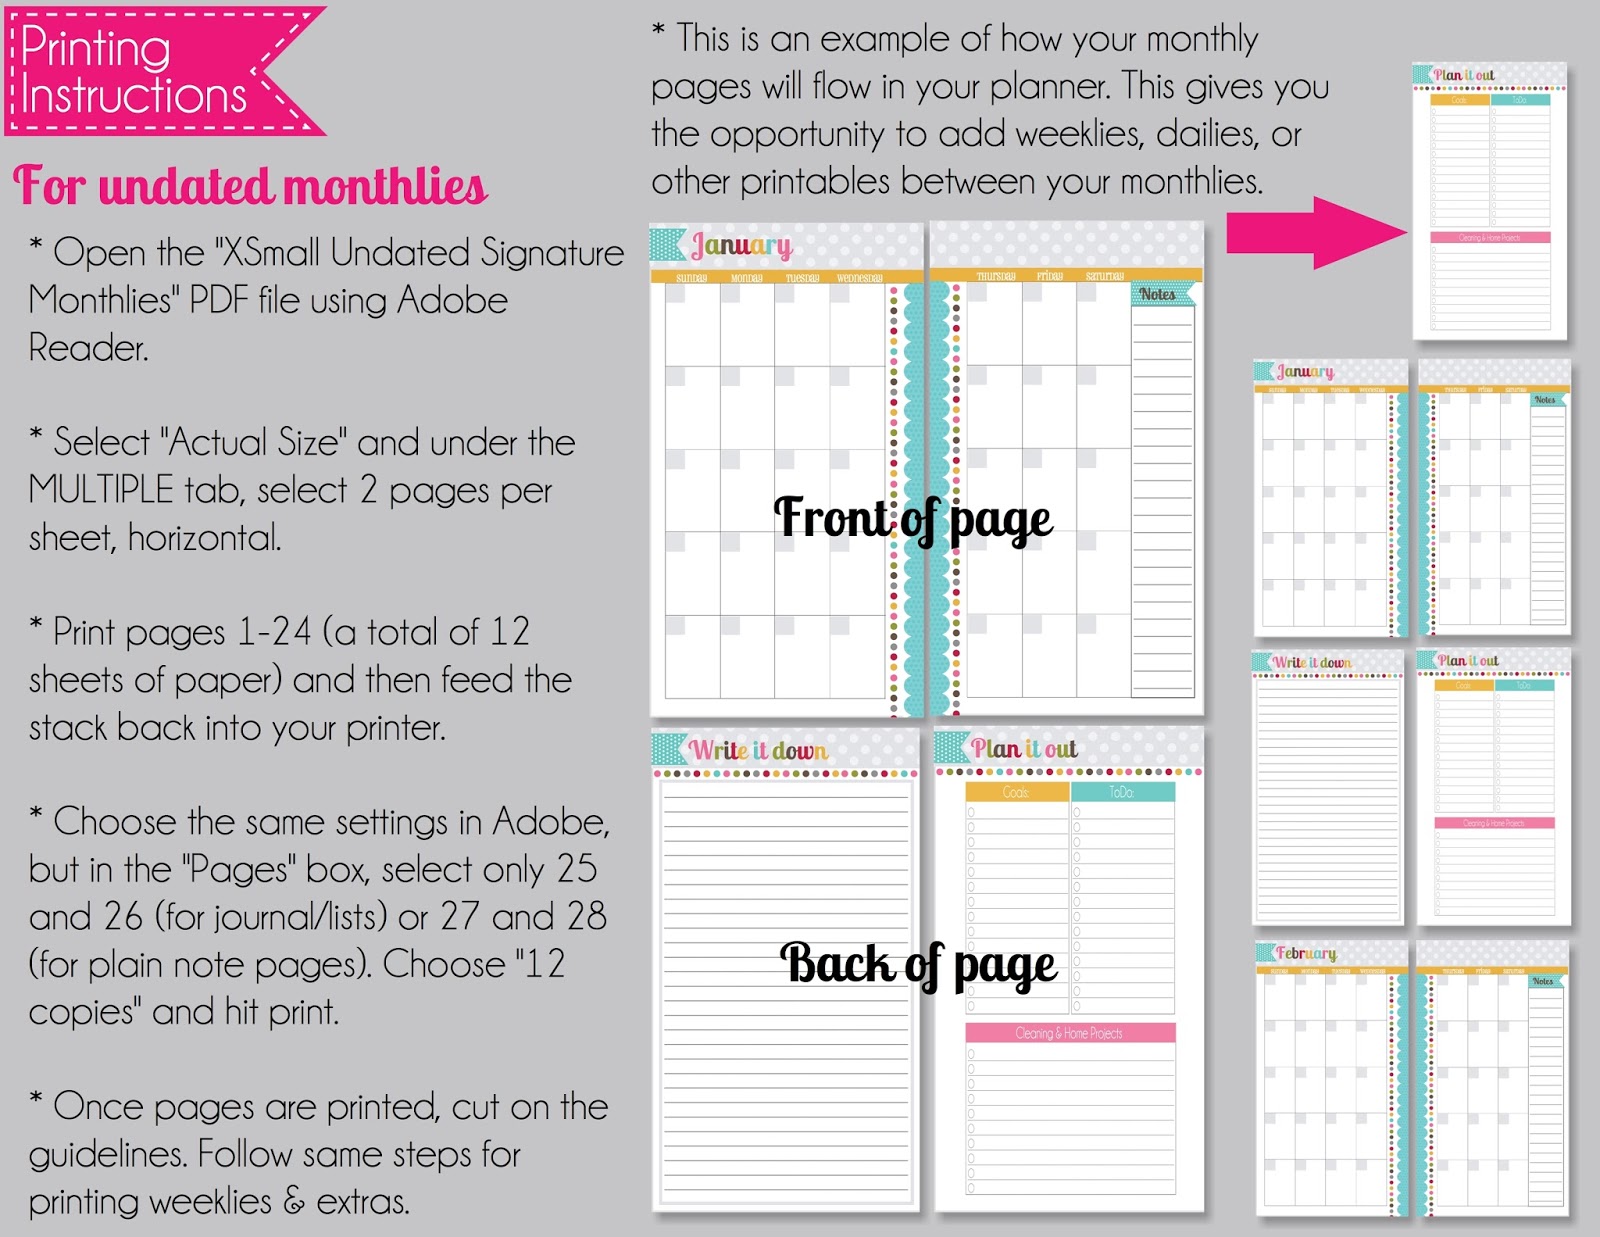
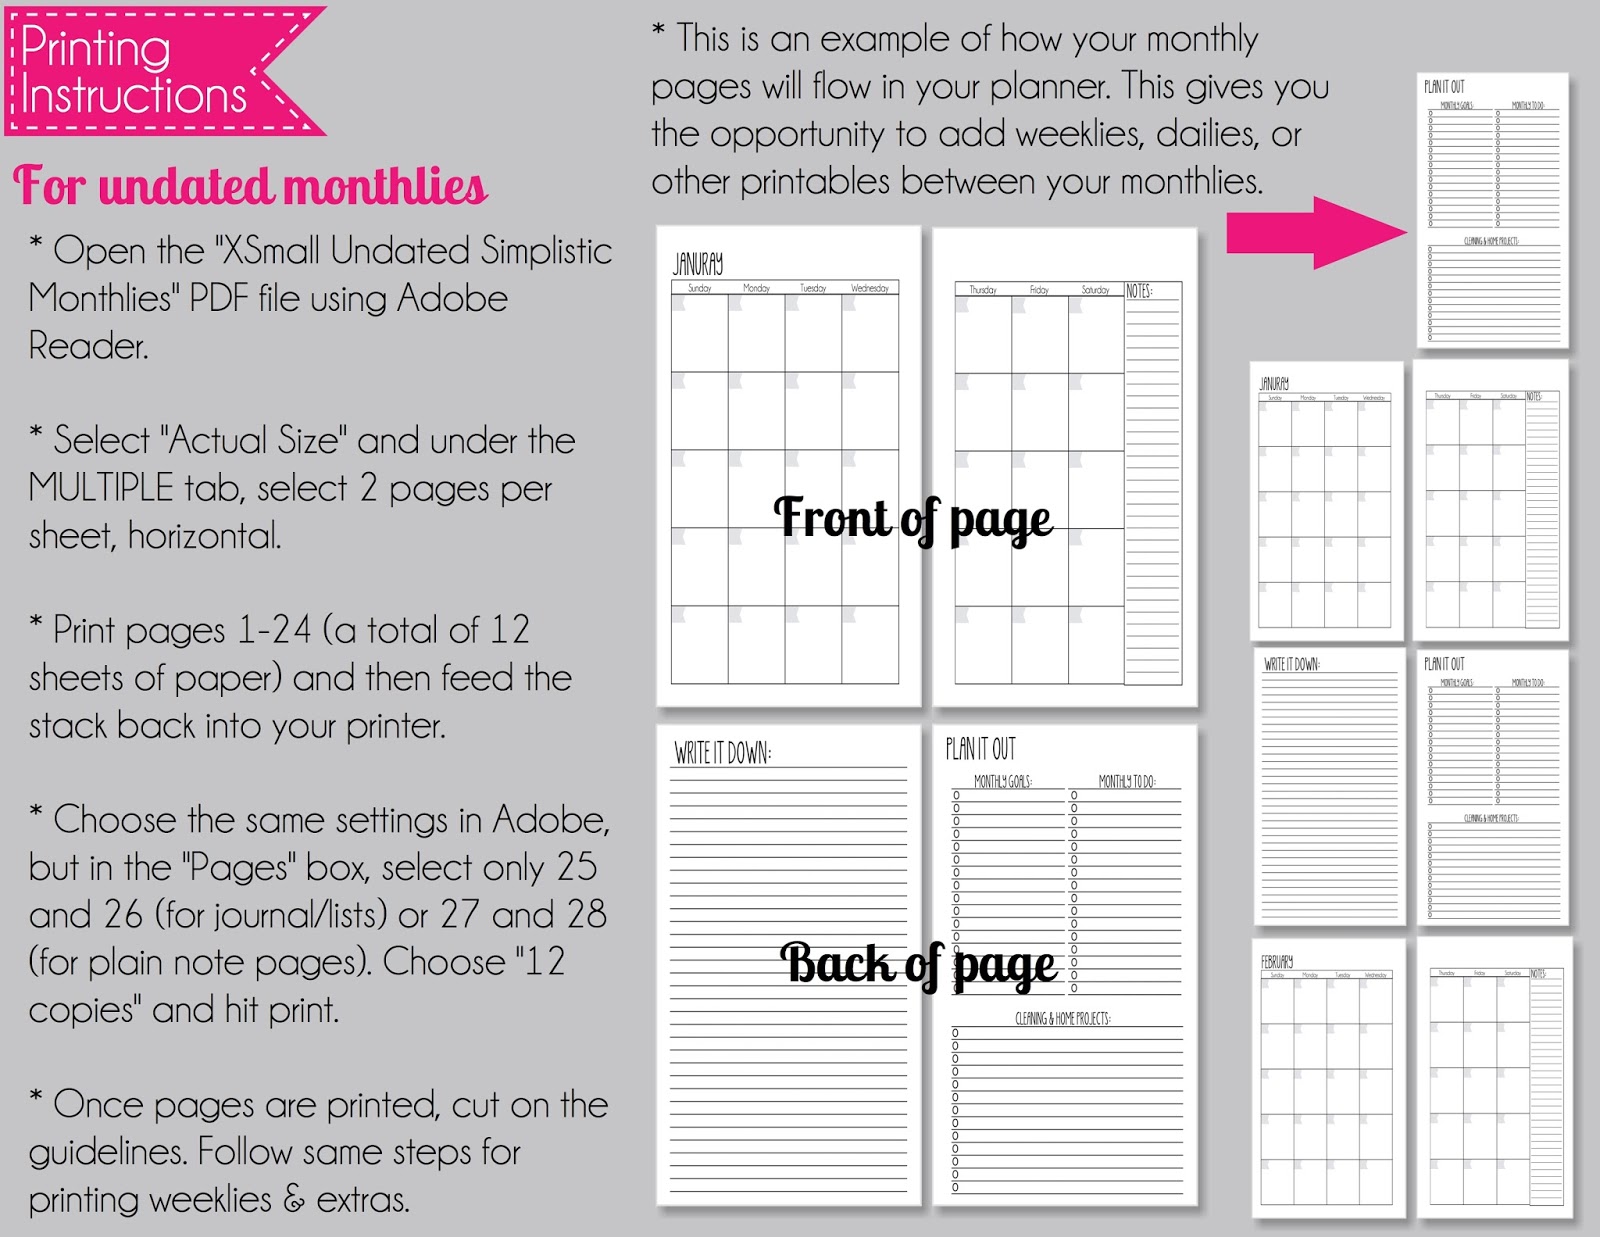
Perhaps the most time-consuming part of the print process is figuring out the order you want your pages in your planner and how they will need to be printed for front-to-back alignment. I've done my best to take out all the guess work and provide a detailed set of instructions and diagrams to help you along the way.
Perhaps the most time-consuming part of the print process is figuring out the order you want your pages in your planner and how they will need to be printed for front-to-back alignment. I've done my best to take out all the guess work and provide a detailed set of instructions and diagrams to help you along the way.
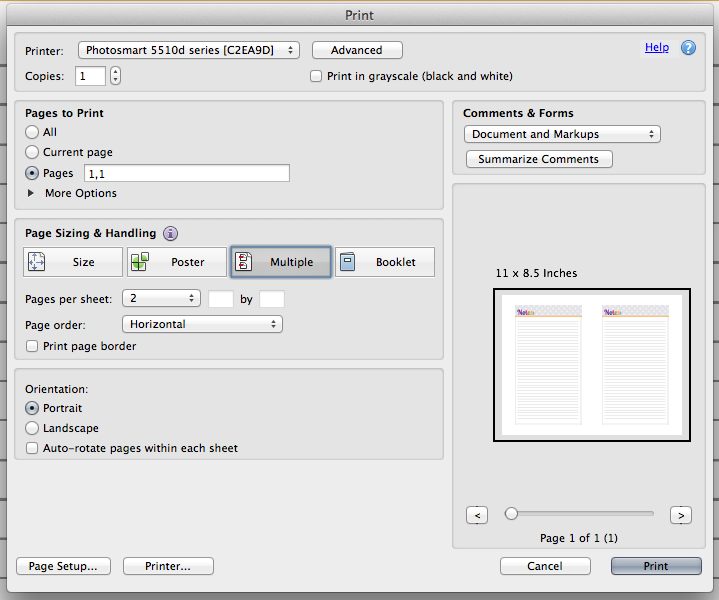
Step 1: Before attempting to print, I recommend downloading Adobe Reader if you don't already have it. Adobe Reader is a free download and it makes this printing process SO MUCH easier.
Step 2: Once you have Adobe ready to go, open your file and select print.
Step 3. Click on the "Size" tab and select "Actual Size"

Step 4: Next, click on the "Multiple" tab and select "2 pages per sheet"
Step 5: Towards the top, specify which pages you want to print. You will see from the diagram I have below that the first pages to be printed will be page 4 & 1 (this order will make sense later). To select specific pages, use a comma between them.
Step 6: Then select print! Using this technique will ensure that pages line up perfectly for front-to-back printing. But figuring out which page should print where can be the tricky part. Here is a diagram to help you out. This set-up for printing monthly pages all in a row (no weeklies in between).

Next, you will want to print your weekly pages, and here are some instructions for those as well.
For the seasonal set, you can choose between 3 different weekly layouts and 12 different color schemes. If you would like your weekly pages to change color with your monthlies, you will need three sheets of paper for each month/color. This will give you a Notes page to start the set (instead of having half of a week), 5 weeks of the 2-page layout of your choice, and a Notes page at the end of the set (again…so you don't have half of a week). Here is a visual of how the pages should be printed:
The first sheet you print will have your two-page weekly on the front, and two Note pages on the back (you can get two note pages on one sheet by selecting the page number twice, separated by a comma. For this set, the page number was 1, so the order specified in the Pages box was 1,1).
ONCE ALL OF YOUR PAGES ARE PRINTED, IT'S TIME TO CUT! I have provided guidelines around each of your planner pages to help you with the cutting process.
*******
The pages used in the examples above are from our Seasonal Set, but here is
HOW TO PRINT OUR DATED SIGNATURE MONTHLY SET
HOW TO PRINT OUR UNDATED SIGNATURE SET
*******
The pages used in the examples above are from our Seasonal Set, but here is
HOW TO PRINT OUR DATED SIGNATURE MONTHLY SET
HOW TO PRINT OUR UNDATED SIGNATURE SET
HOW TO PRINT OUR UNDATED SIMPLISTIC SET
I know that reading these instructions can seem overwhelming. There are quite a few steps involved in printing your X-Small pages, but the work is truly worth the effort :)
And once you have your planner set up and the print process down, be sure to download all of our other fabulous FREE planner extra pages!!!

This file includes 13 additional pages for your X-small/Personal planner. It comes with 2 party planner pages (Wish list and Invite tracker), Password tracker, 3 important Dates lists and 7 checklists, including a blank checklist that you can customize for your needs!
{Download Here}
***Please note that all FREE printables shared on ThePolkaDotPosie are for PERSONAL USE ONLY! You may pin these pages and share them with others, but always link back to this post and give credit when necessary. Thank you!***
Thanks so much for stopping by today to check out our brand new pages!!!!!
Happy Planning!!
Love the designs and the printing instructions will help a lot of planners.
ReplyDeleteLove love love!! having the seasonal page colors is one of my fav things about your set, but now I love that snap set too!!
ReplyDeleteDo you have plans to do similar pages for the small size? I really like the snap pages and the choice of weekly pages.
ReplyDeleteWhat about us Franklin Covey compact size lovers? Those inserts are a half inch wider than Filofax personal size: 6.75" length x 4.25" width. Can you offer that size?
ReplyDeleteI have the same question. It would be a shame to waste the extra space.
DeleteLove these, and have downloaded the extras pages just so I could see how they turn out before going ahead to make a purchase, and I cannot get them to print out right, I can't seem to get the "actual size" thing on my printer to work (I actually can't find it as an option - I'm using Windows 8 and there are lots of things I can't find...) Any tips on how I might be able to rectify this problem as I really love your designs? Cheers
ReplyDeleteThanks for this wonderful set!!
ReplyDeleteWill the printing method work on A4 paper instead of 8.5x11?
Will they print out correctly on UK size A4 sheets??
ReplyDelete