Wednesday, February 26, 2014

Month 2: Organize Your Workspace

I struggled trying to name this month's organizational project because I didn't want the title to suggest that it was all about setting up your desk. Sure, creating a bright and functional workspace is key to productivity, but it goes beyond just that. What if you have to take your "workspace" on the road! 

In this post, I want to share 5 tips that have helped me keep MY workspace {both at home and on the road} organized and functional. I am by no means an expert in this department, and I am always open to new ideas, so feel free to post a comment on this thread if YOU have a great tip to share.


1. Find a Nook

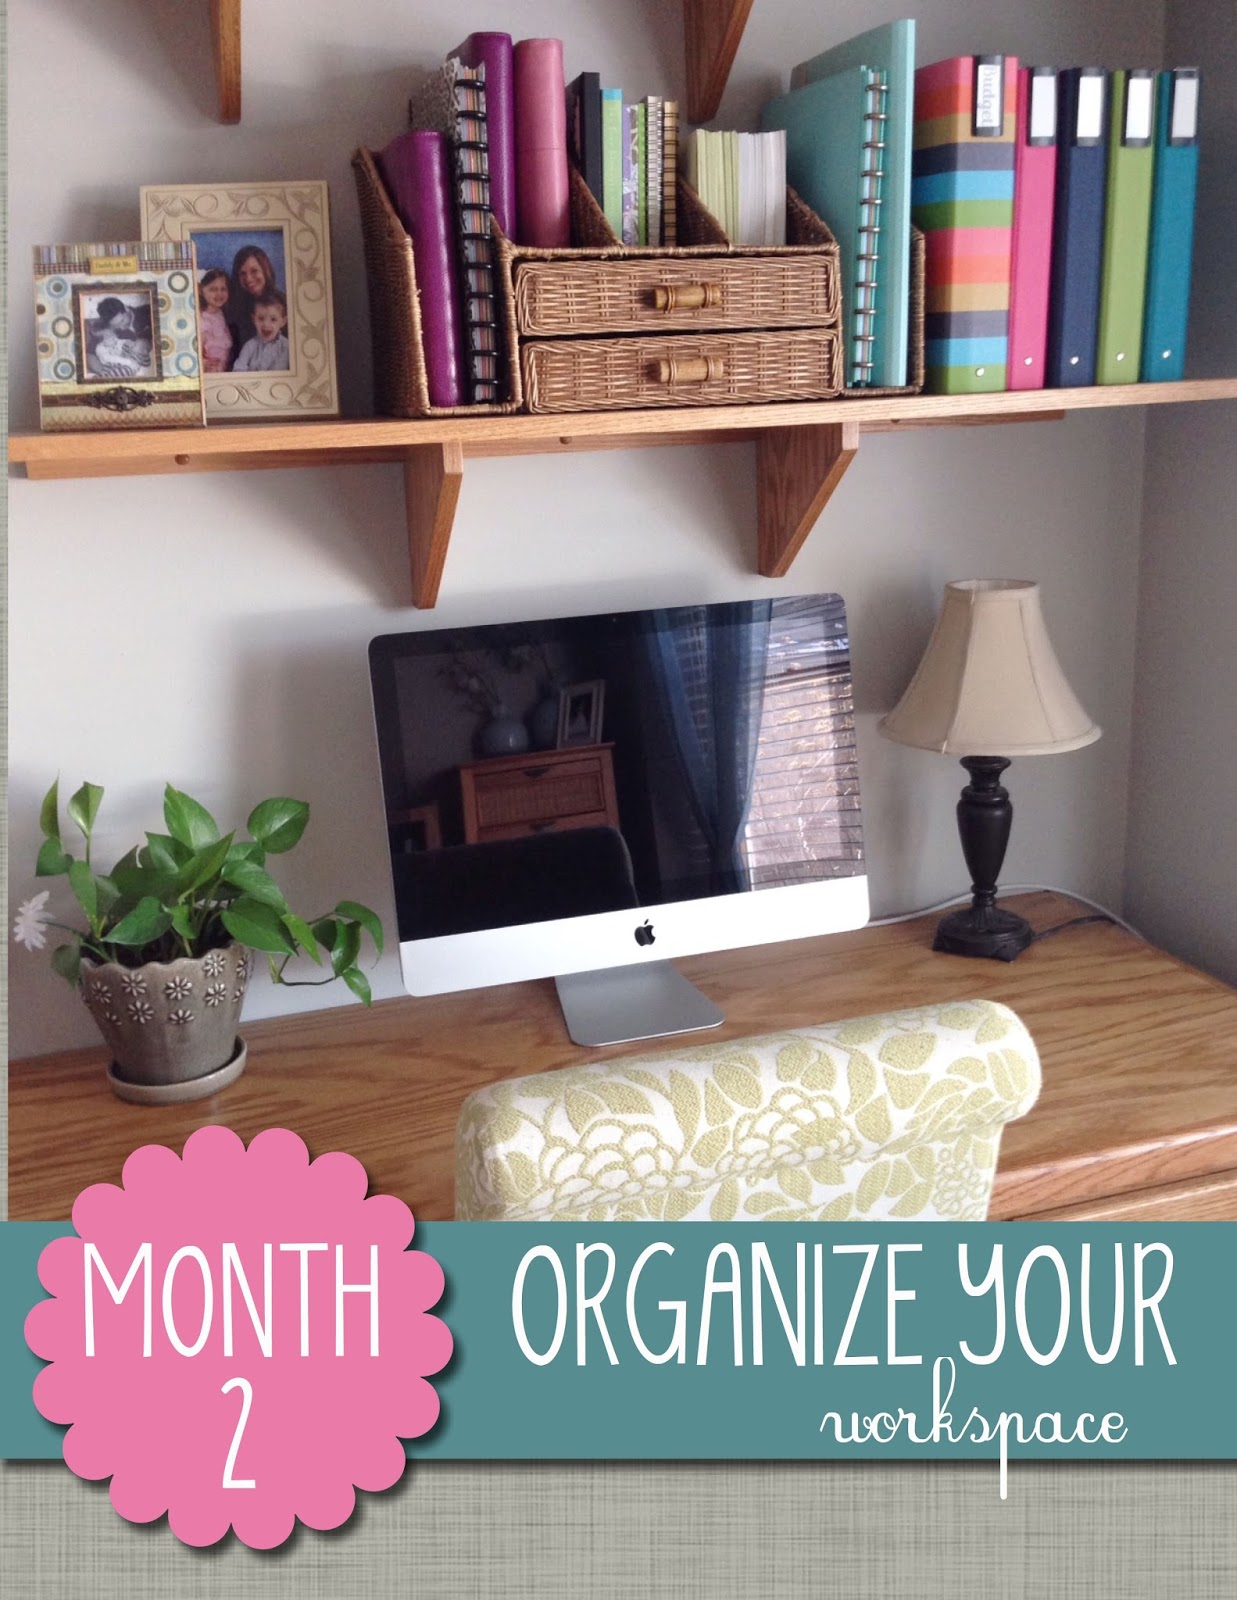
Whether you have an office all to yourself or a tiny little nook in your bedroom…it's important to find a space where you can set up shop. For many years, my workspace at home was a little computer cabinet that I had tucked into my bedroom. I used it in college in my tiny apartment and I used it again when I sacrificed my office space at home to give my babies a playroom.


This little nook served every purpose I needed at the time. It gave me a space to work, a place to house my ridiculous sticky note and stationery collection, my printer, and even a few other office odds and ends. It was organized, it was functional and it was TEENY TINY!! Which just goes to show you that you don't have to have a big room, or even a big space to get your work done. You just need a landing pad. 

2. Have Everything Important Within Your Reach

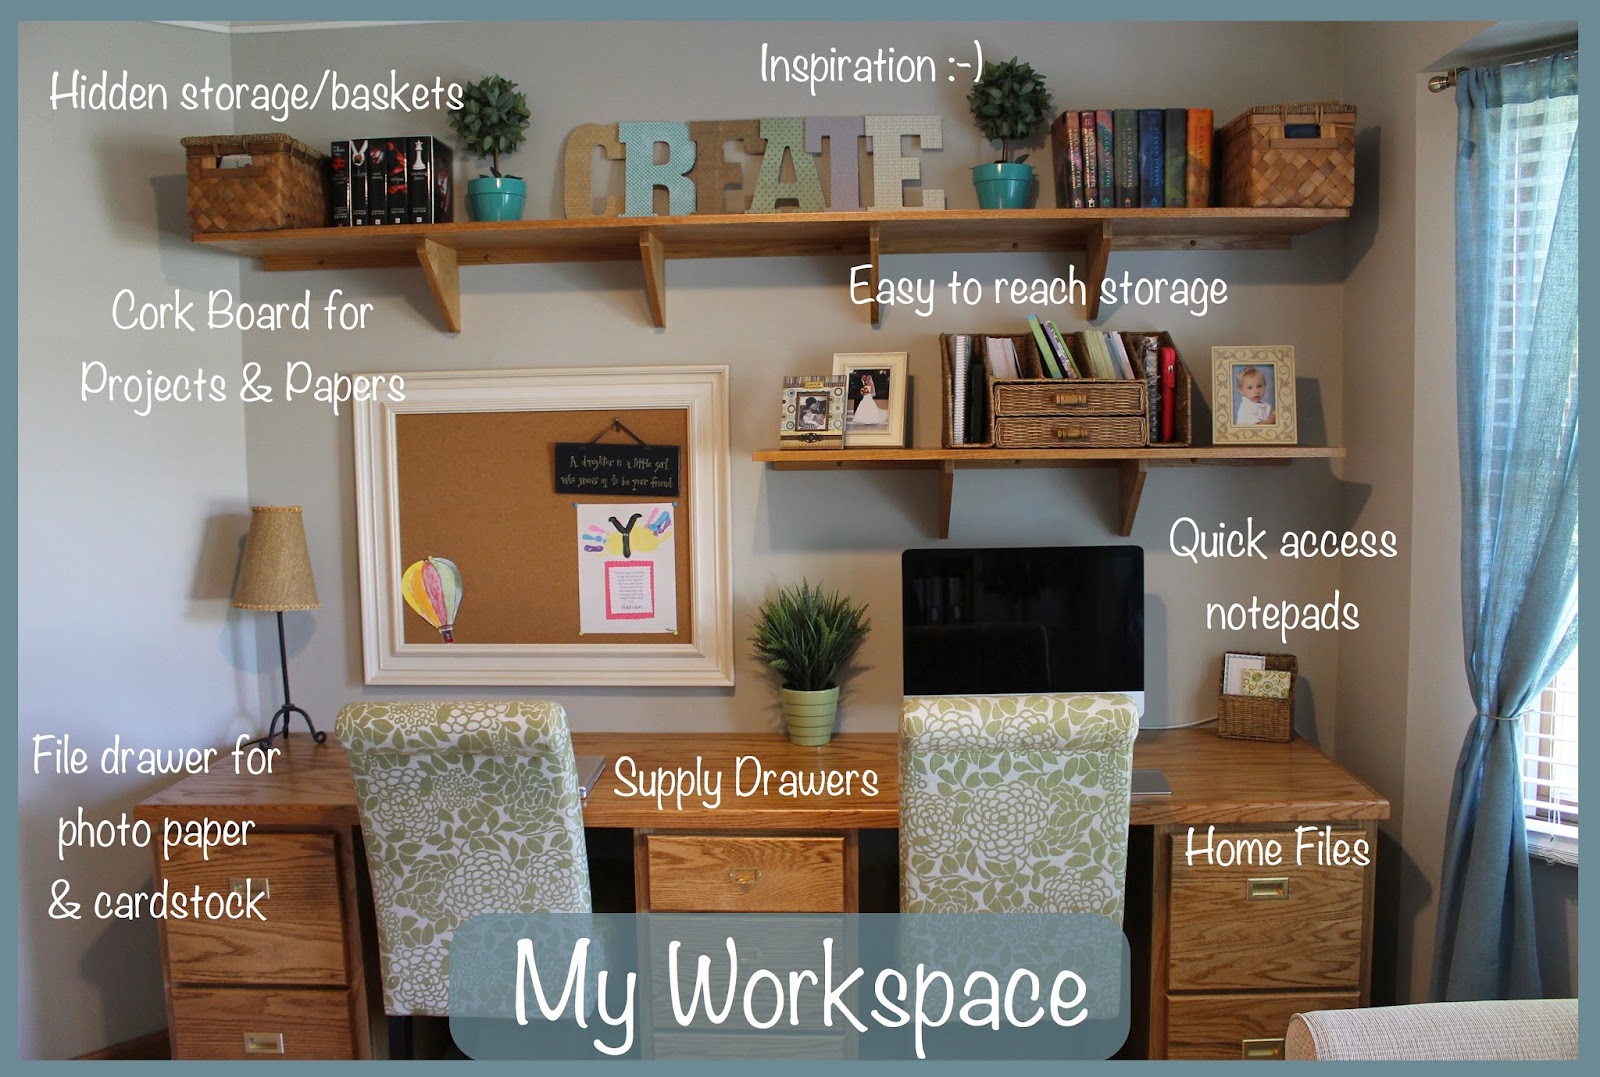
About 2 years ago, when my mom and I decided to open our shop and my kids were old enough to have their playroom in the basement, I decided to reclaim our spare bedroom and turn it into my dream office/craft room. My Dad helped me design it and every nook and cranny was custom made for my needs.


When my Dad and I were designing the office, I just kept thinking about my sweet little computer cabinet. How easy it was to work in that space because everything I needed was right within my reach. 

I knew I wanted the same setup in this new office, so my dad added some very important detail to my desk area…a shelf above my computer space, supply drawers to my left and a file cabinet to my right.


Now, when I sit at my desk and work, I can reach all of my important files, pens and paper for jotting down notes and of course, my various binders and planners. 

And you don't need a fancy custom desk to achieve this. Ikea carries incredibly inexpensive shelves that would work perfectly above any desk, and if you want a good tip, Garage Sale Season is the perfect time to find inexpensive file cabinets, desks and if you are lucky…a fun computer cabinet :-)

Just remember when you are planning your workspace, make sure the things that are important and get used every day are within your reach. It saves you time and keeps those pesky piles of papers from taking over your desk. 

3. It's All About the Planner

It's no secret that I am a Planner Junkie. I have been for the better part of 15 years and I am fairly certain I was obsessed with paper and notebooks long before I owned my first Franklin Covey. And although I like to joke that it is an addiction for me, using a planner is a necessity in my life. In college, I only had one. Just one little planner that had my whole world inside of it. 

But now, as a Mommy, teacher and shop owner…my organizational needs have changed. I do still carry a personal planner {that holds my calendars, health & fitness pages, travel info, etc.} and I also have a Home Management Binder {that holds all of the kids' school and activities schedules and paperwork, important contact information, etc.} 

But for my two jobs…I have found that it makes the most sense to give them their own planners. That way, when it's time to head to campus and teach or attend a workshop, I can grab my Lesson Planner and head out the door. No more fumbling around for the papers I need or the notes I've taken. They are all in one place in their own planner.

I also do this with my Etsy business now. I find that having all of my documents in one place makes it easier to stay organized and track more efficiently {you can read all about how I organize my Etsy and Small Business Planner here}. 

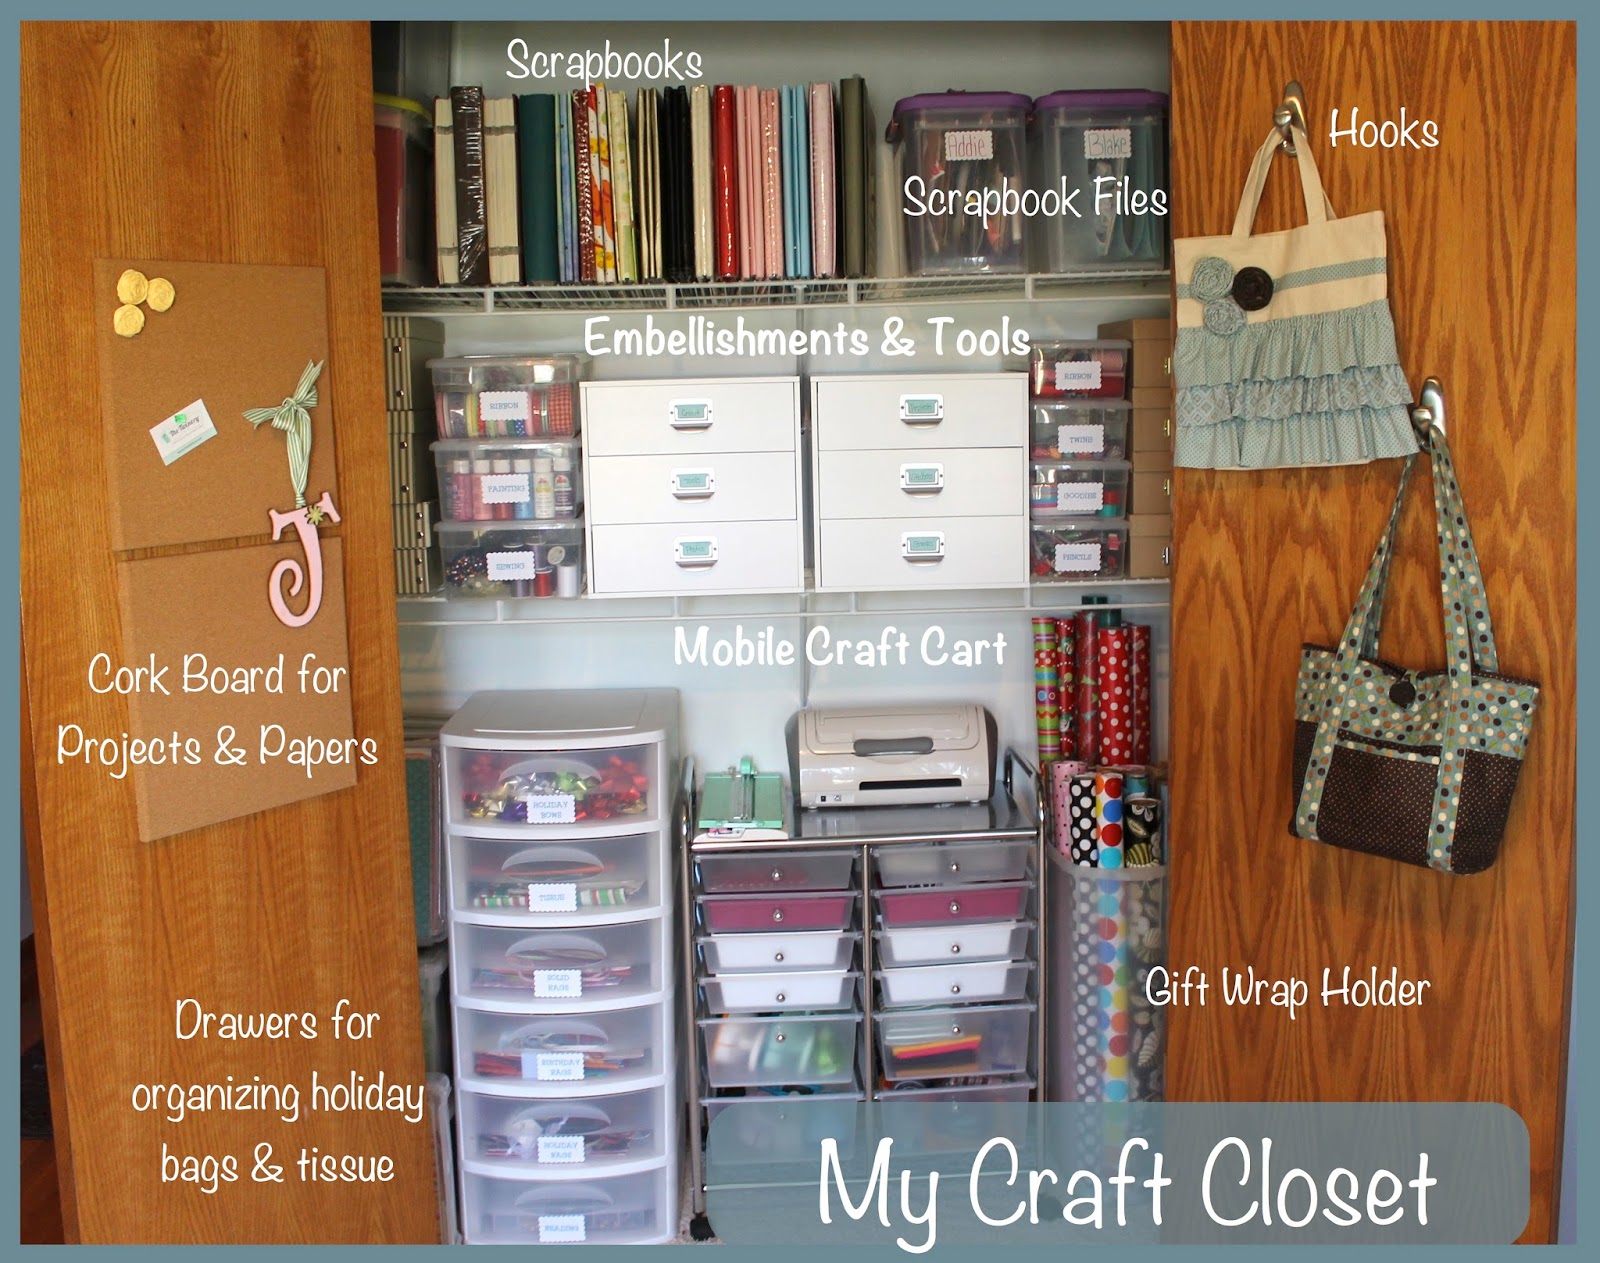
I have also found that keeping track of my business receipts and paperwork in a labeled accordion file is a lot more organized then tossing them into a big file drawer.


I also keep my planner and file folder together above my desk so that when I do my book keeping, I have them within my reach.


Having a portable system like this allows me to grab my business and take it on the go when I need to work away from home.

For those of you in the Direct Sales Business, you know first hand how important it is to have everything with you when you do home shows, events, trade shows and conferences. You can read about the Direct Sales Planner we have available in the shop now and hopefully it is something that you can use to make your portable system more efficient and organized.

4. Find the Perfect Portable Workspace

Speaking of being on the go…raise your hand if you are constantly on a quest for the perfect work bag? Are you raising your hand? Me too. Or at least I was until I stumbled upon the most perfect portable workspace at The Container Store.


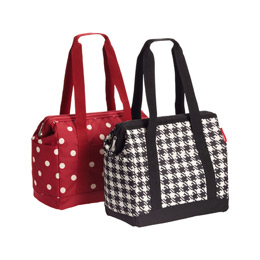
I have always been a big fan of Reisenthel products. They hold up to EVERYTHING and they always have fabulous patterns and designs. When I saw their Small Allrounder Bag, the first thing I thought was…"It's a Mary Poppins Bag!"

And that it is, my friends. Because I am an adjunct instructor, I don't have my own classroom on campus. All of my textbooks (I have to carry at least 3), my lesson planner, all of my dry erase markers, school supplies, umbrella and other essentials need to be toted back and forth to work with me. I happily own a closet full of different work bags, some that I still love very much, but the ONE THING that drives me absolutely crazy about most work bags is that things fall to the bottom. I also can't get them open wide enough to search for the things I need while I am teaching. 

But this bag…I could practically crawl inside.


It is PACKED with pockets on all sides to hold my pens, markers, supplies, umbrella, water bottle and more. And the center holds my Lesson Planner, 3 textbooks, 2 folders and my personal planner WITH ROOM TO SPARE!! At has a nice wide bottom so it sits right without toppling over and just LOOK HOW OPEN IT IS!! I really can't say enough about this bag or how perfect it has been as my portable workspace/classroom.

If you are on the hunt for a new work bag, I highly recommend you check this one out, especially at the $34 price point. But if that is still out of your budget, just remember that the same concepts for your home workspace should apply to your portable one. Everything you need should be within your reach. You shouldn't have to dig to the bottom of a big bag or scramble to find the things you need when you are on the job. The bag should be nice and open, have lots of pockets, and plenty of space for your necessities and a few fun accessories. 

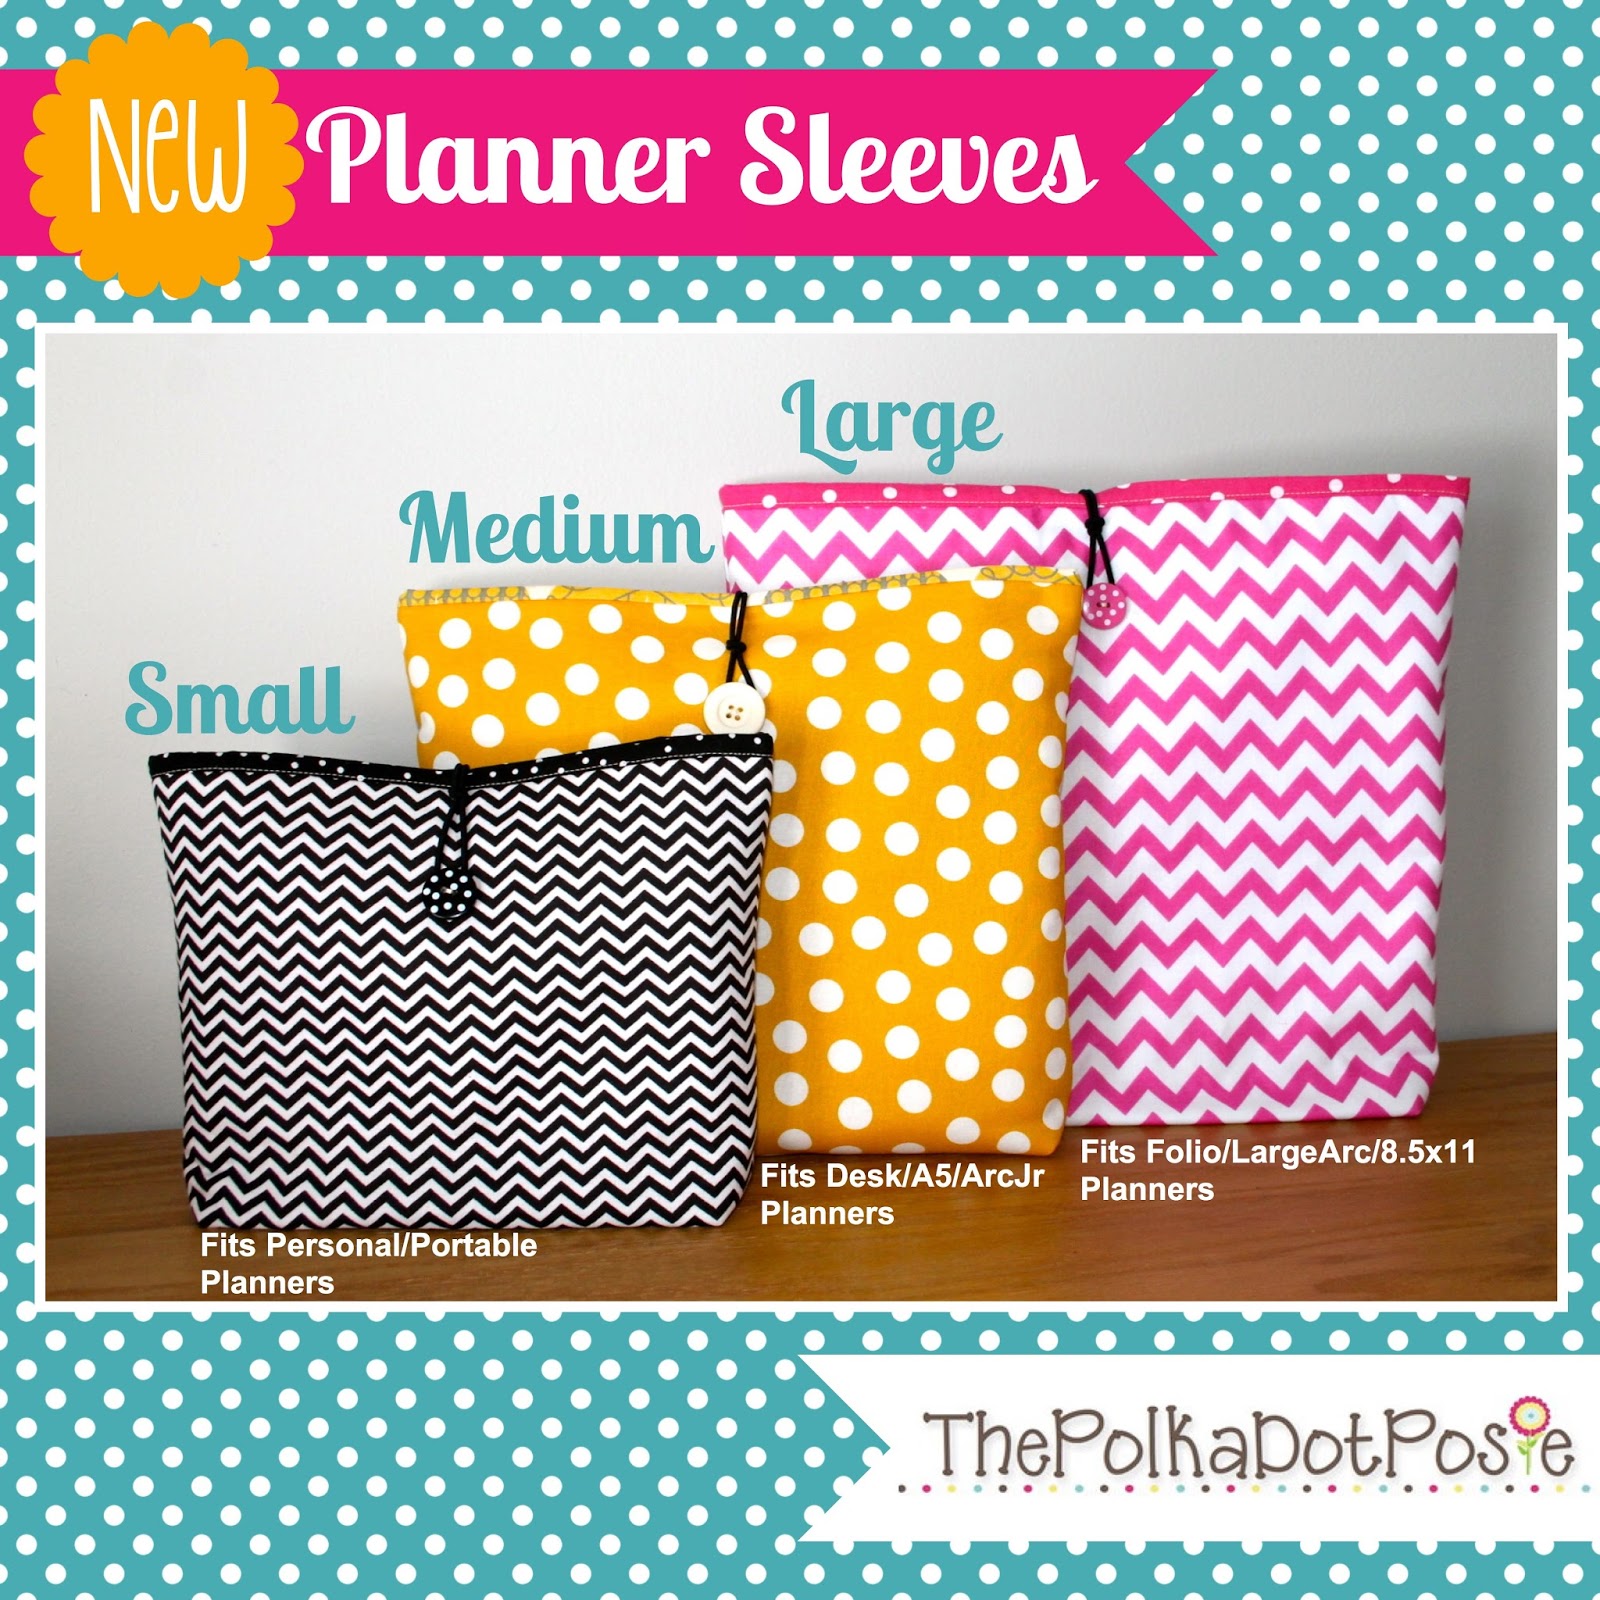
And speaking of accessories…you see that adorable lime green chevron sleeve my planner is in? That is one of our newest products!! After ruining too many beautiful planners with scratches, ink stains and water marks…my mom decided she needed to create something to protect our planners in and out of our bags. So friends, I give you our...


They are now available in our shop in multiple sizes and you can check them out HERE.


5. Be Open To Trial & Error

If I told you how many times I have rearranged my office, or how many work bags I have bought and tried, or how many planners I have sitting in my closet…you would know just how big a fan I am of Trial & Error. What works for one person and their job, doesn't always work for another person. And, what may have worked for you at one stage in your life, may not work for you now. 

Creating a workspace that is adaptable to your changing needs is so important and you may find yourself trying something new every week until you get it right. And that's okay!! That's the process of organizing…trying new things until you find a system and a setup that you can stick with!! For me, designating a workspace {regardless of it's size}, having important things within my reach, creating multiple planner systems to organize my home and my career and of course, making it all portable are necessities. It's how I work best and I only know this because I have spent a lot of time discovering what didn't work.

So..if all of you could share one tip for organizing your workspace, either in your office or on the go, what would it be? Sharing is caring :-)

Well I hope you have enjoyed this months organizational project, even though I am getting it in under the wire :-) But stay tuned for Month 3…it's all about SPRING CLEANING!!! Woohoo!!!


Wednesday, February 19, 2014

Introducing Our Etsy & Small Business Planners!

When my mom and I started our Etsy business together two years ago, we were clueless about the types of documents we would need to keep our records organized. In the beginning, we just flew by the seat of our pants…jotting down custom orders on sticky notes and tracking expenses by shoving receipts into a file folder. 

But as our business began to grow, we realized we needed a more efficient system. We needed a planner just for our shops that would help us track expenses and sales, inventory and supplies, business contacts and customer orders, marketing and promotions, etc. My mom joked and asked if I knew anyone that could make something like this for us :)

And so my project began…


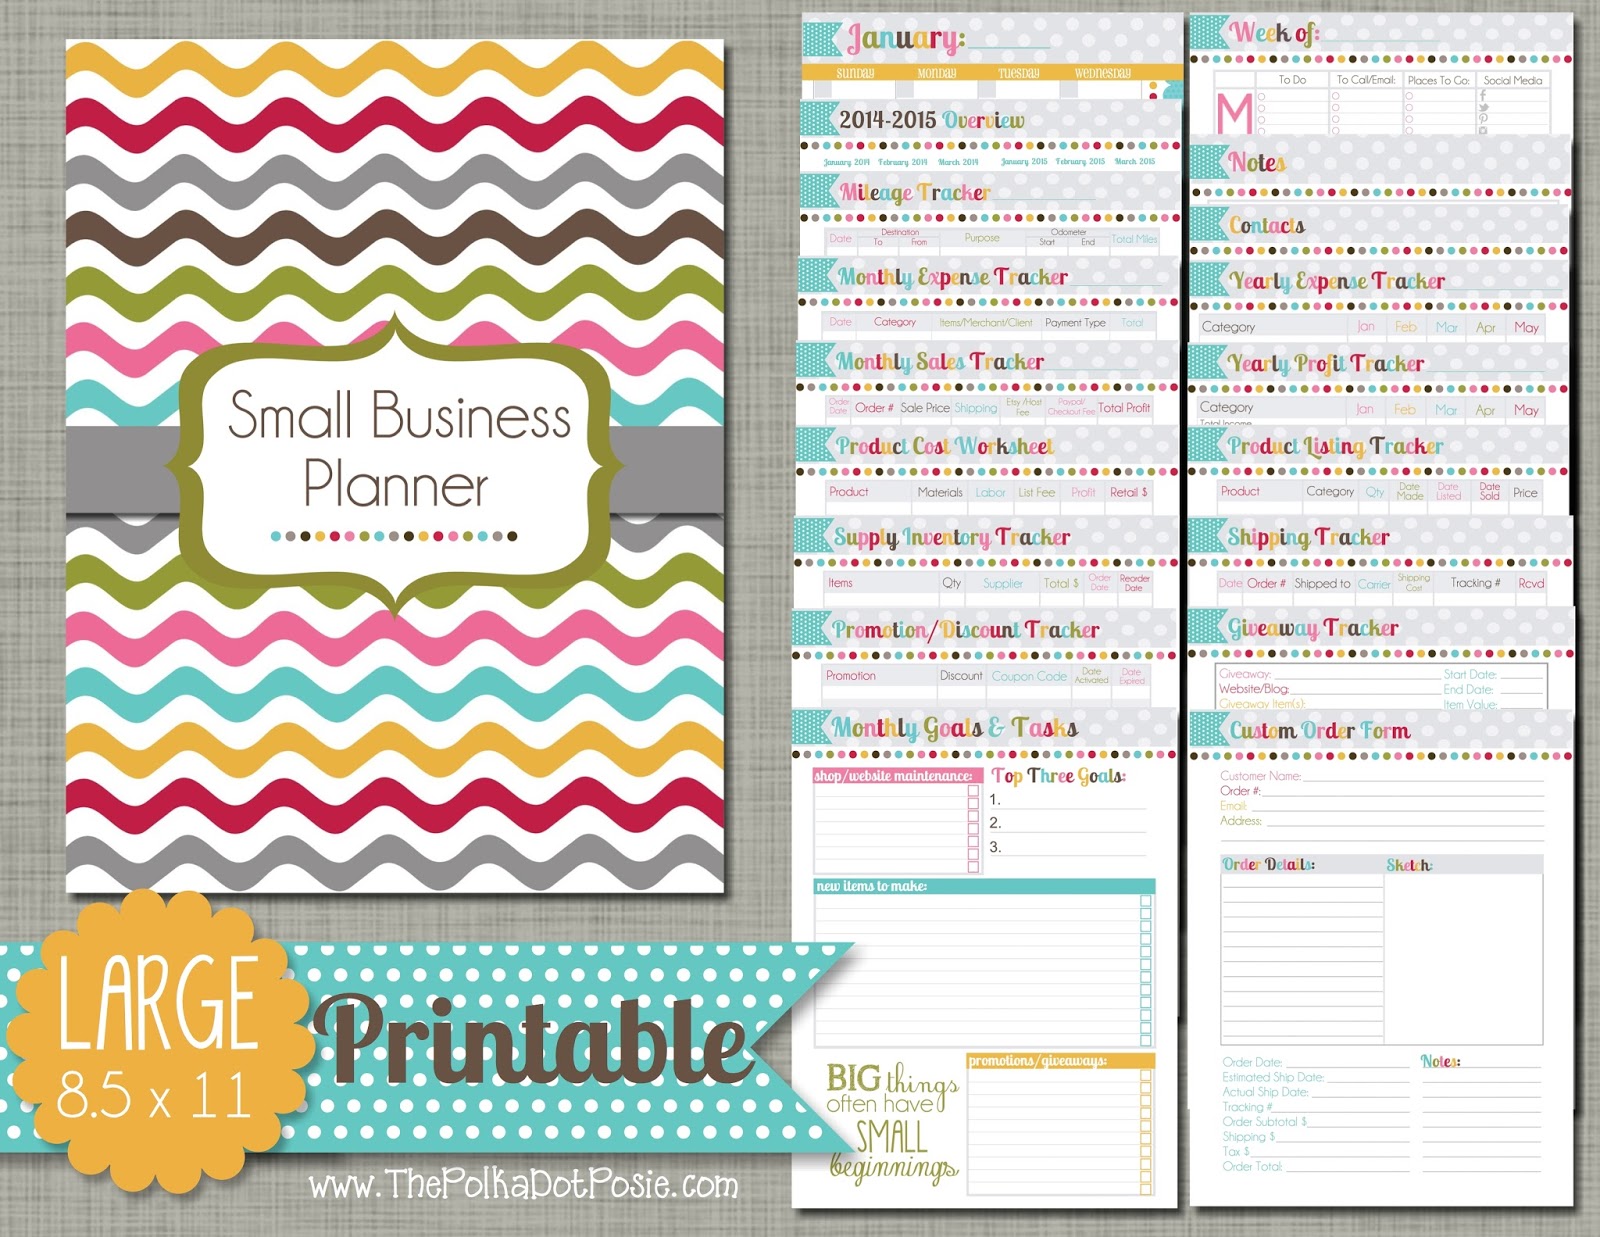
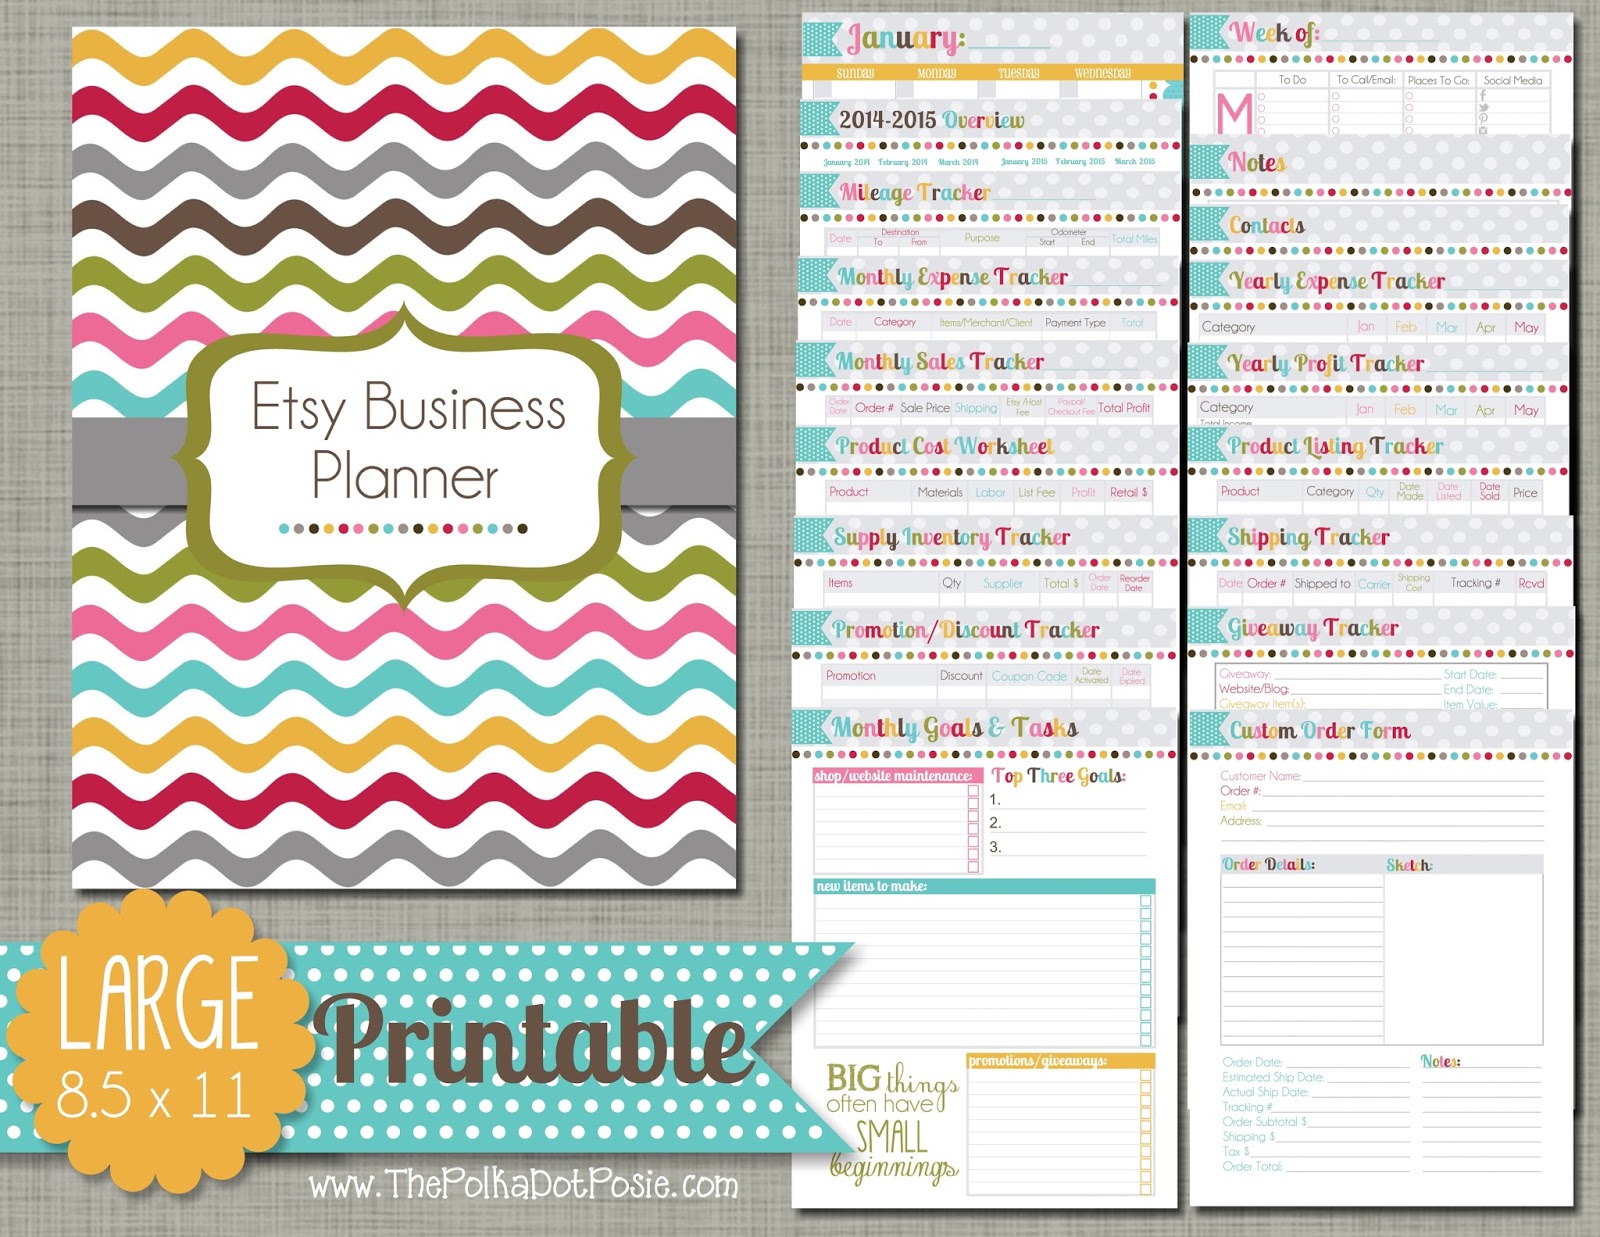
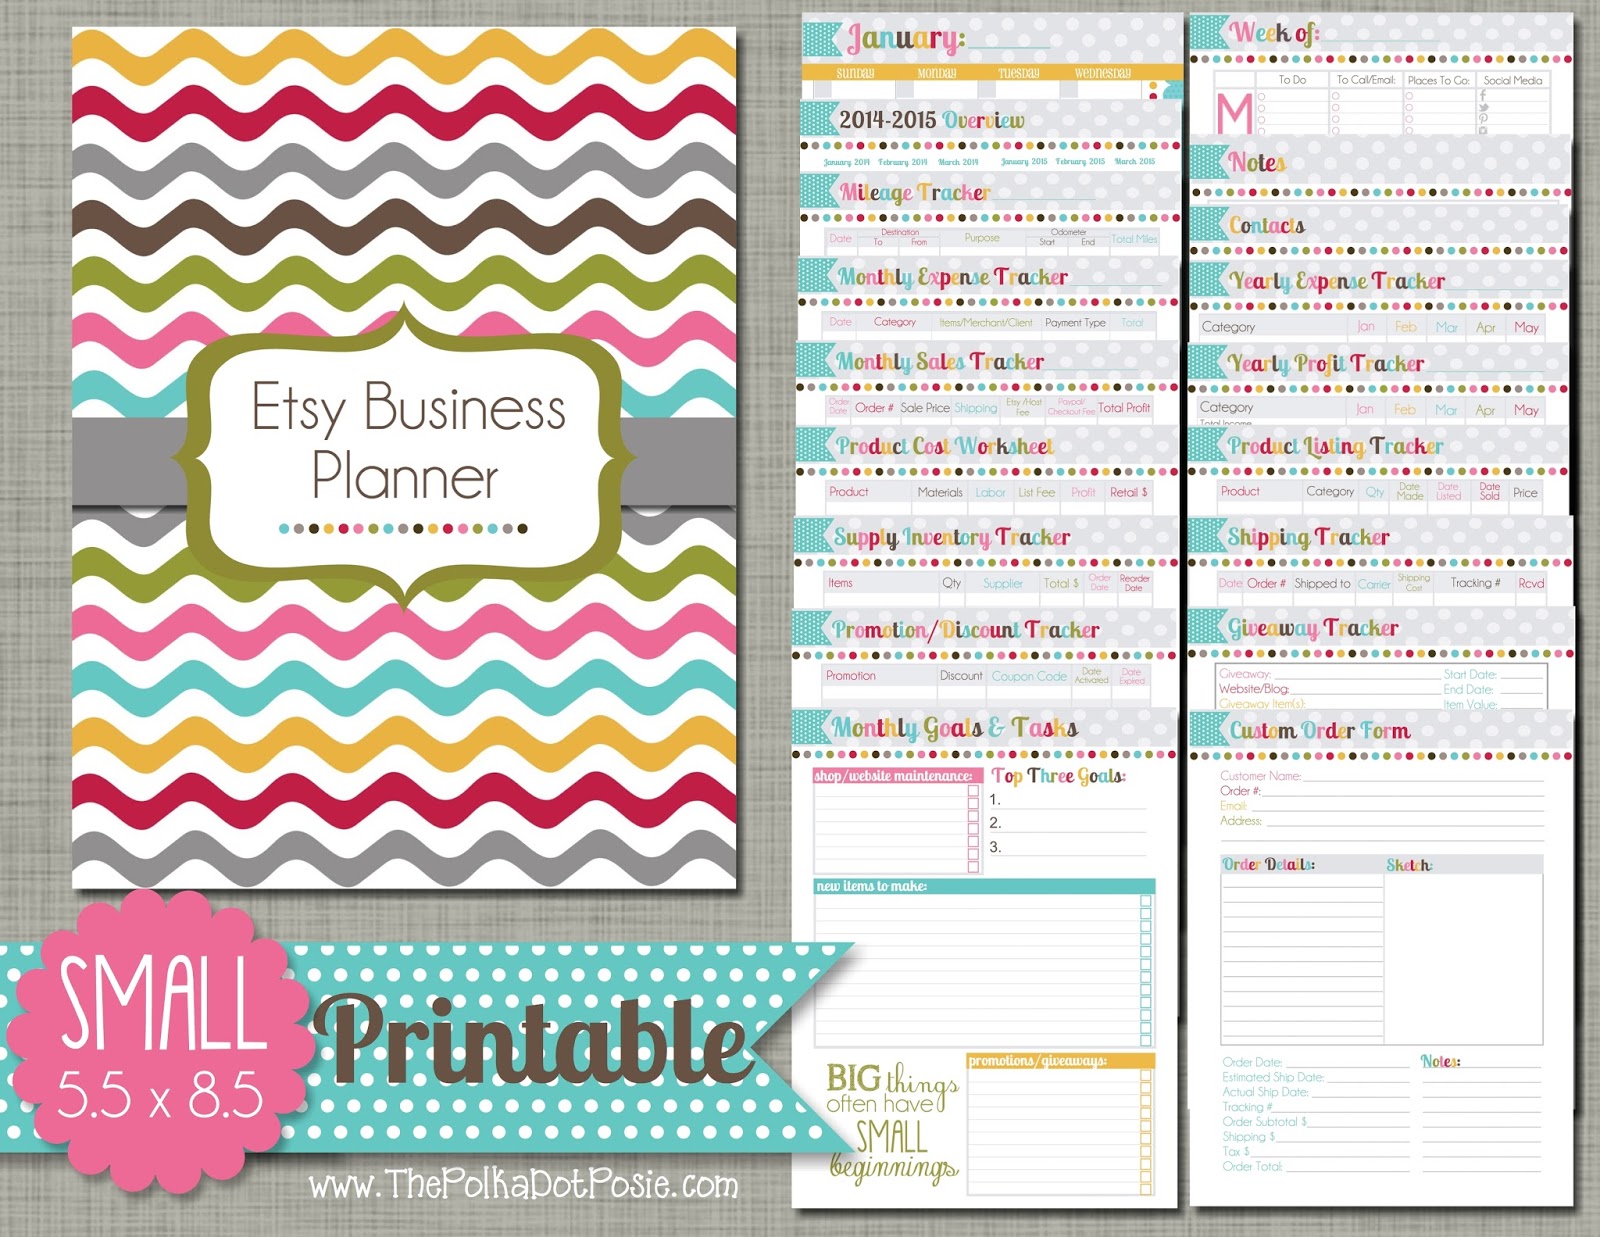
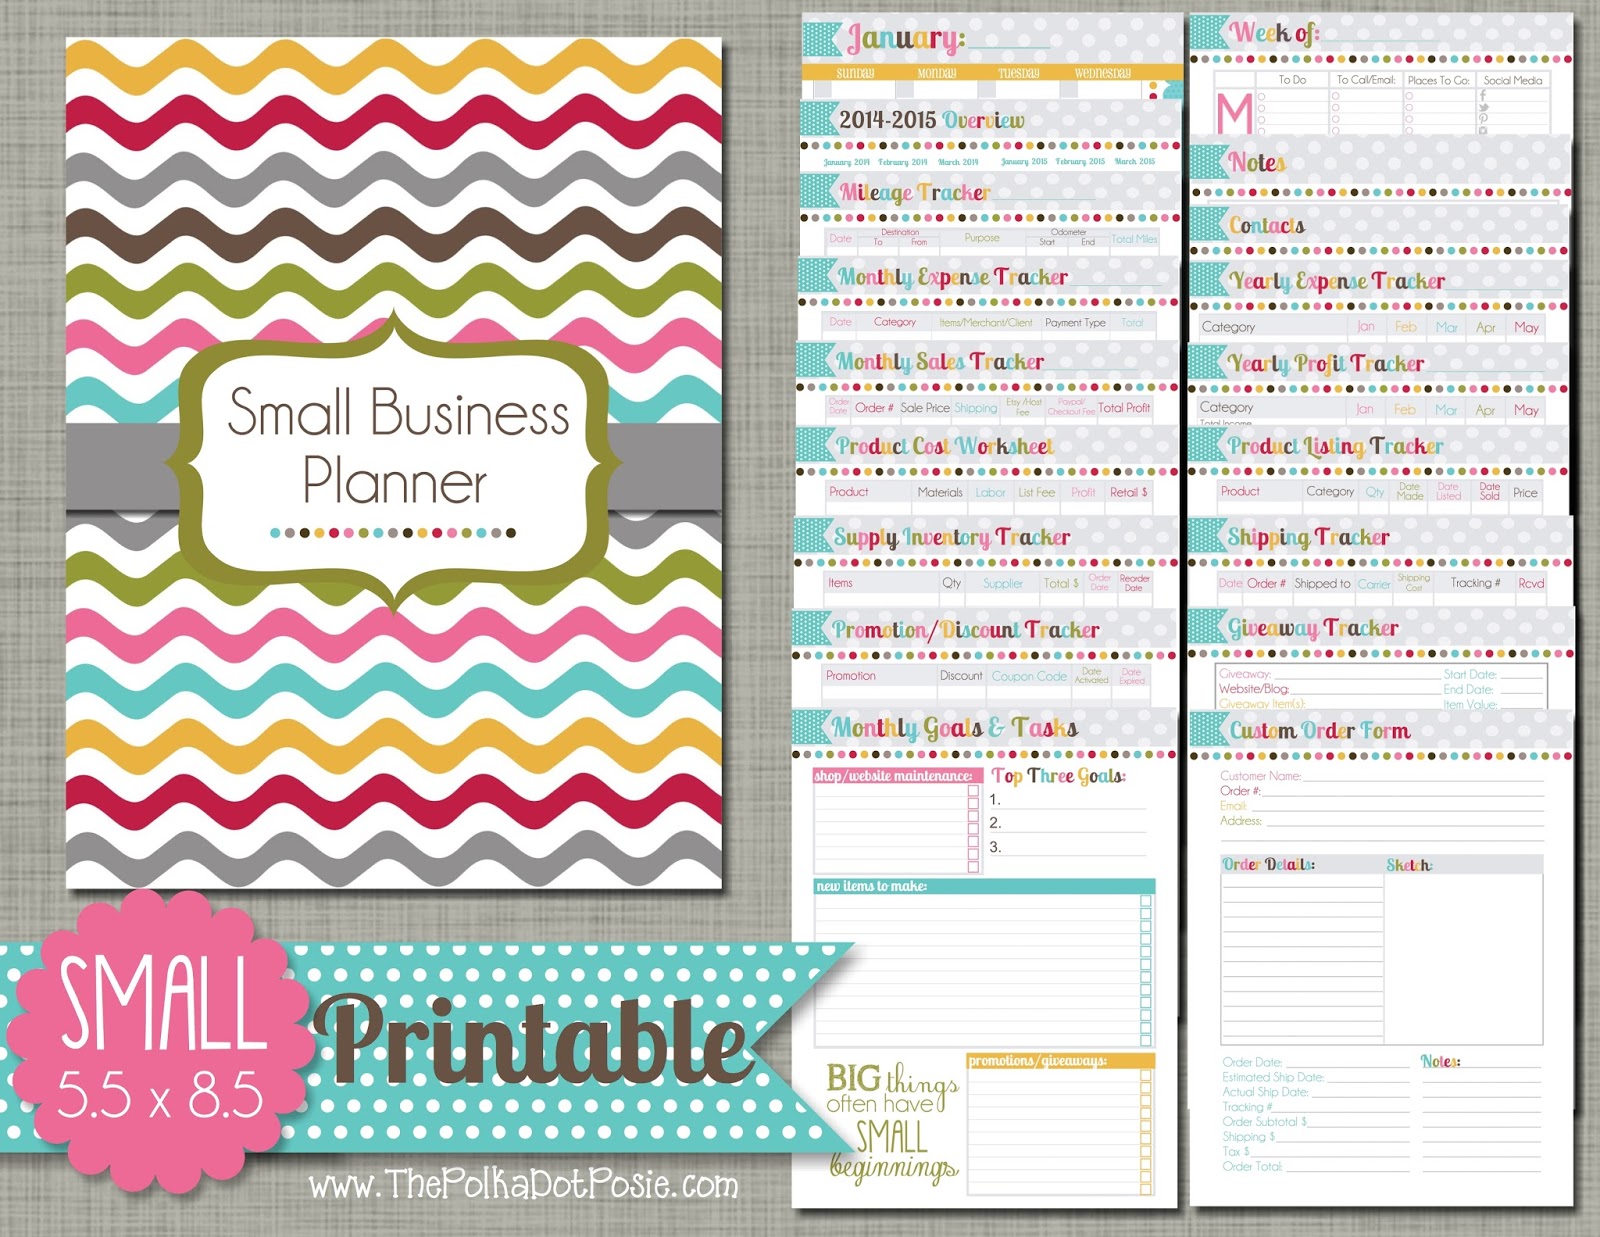
Developing a planner that would work for all Etsy and Small Businesses was a challenge, especially because I am a printable junkie and find myself wanting a list or tracker for everything. But in the end, we narrowed it down to the essentials and found good balance in the categories we created for our planner. Here's a little look at what our new Etsy and Small Businesses Planner has to offer:

As always, we are offering two different sizes in this planner with two different cover options to choose from, depending on your business.


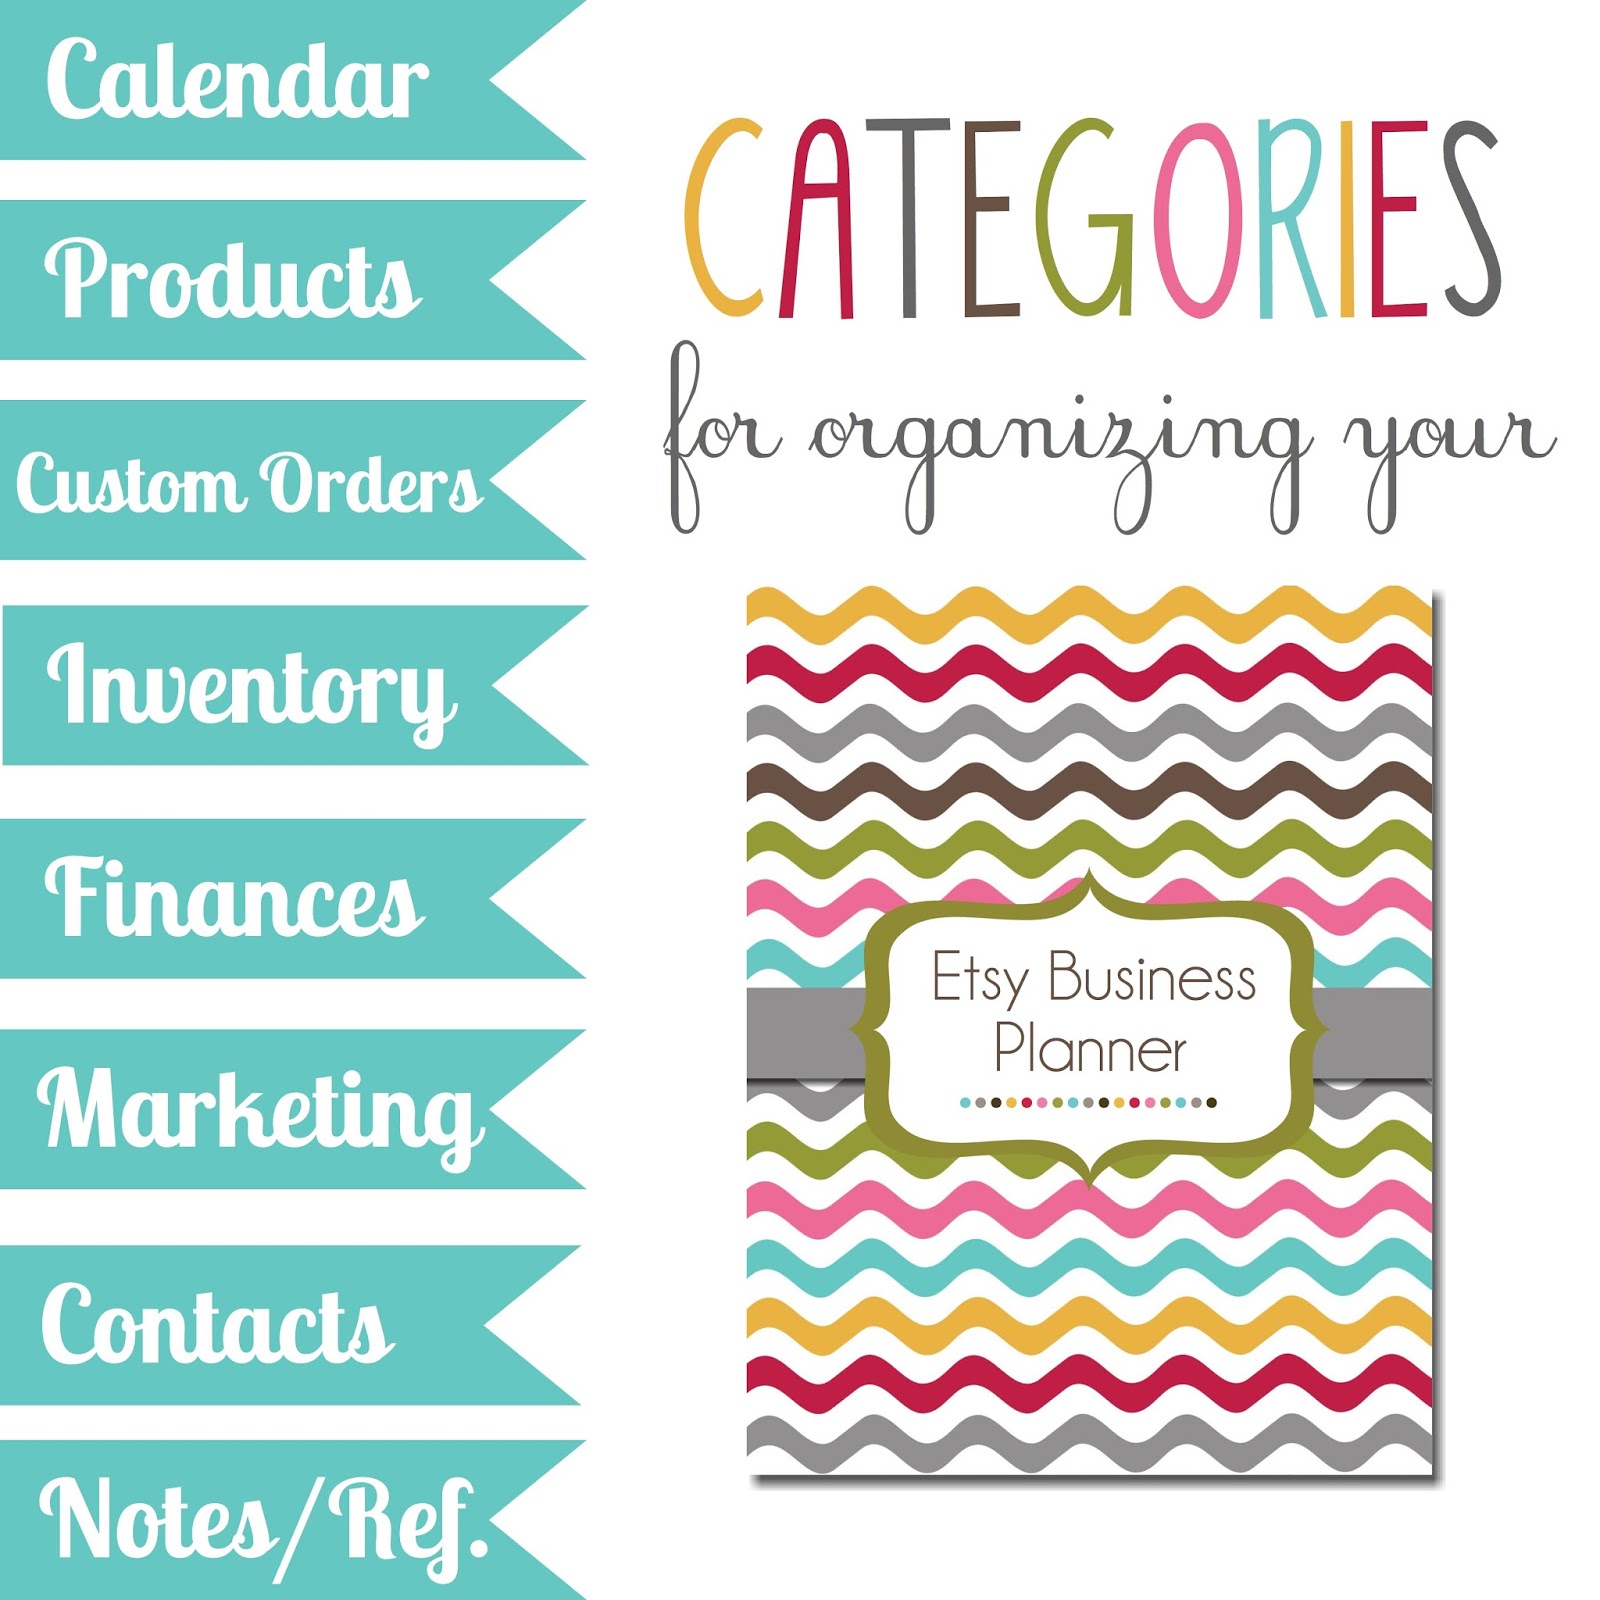
How you organize your business planner is up to you and the files in our planner sets are flexible enough that you can arrange them any way you like. But if you are looking for some guidance in that that department, these are the categories we use with print instructions on how to set up each section:


CALENDAR:

In our calendar section, we include our Monthly Goals & Tasks page, which is placed before each month with a Notes Page.


This is where we write in tasks for the month, like updating our website, shop and blog, and also plan out any promotions or giveaways we want to offer. There is also a large section for listing new product ideas, as well as a "Top Three Goals" section to keep us motivated. We use the Notes page to jot down quick ideas, tasks, ToDo's, reminders, etc.

Following the Monthly Goals & Tasks section is our 2-page monthly spread.


There is the option to include weekly pages after each individual month, but we like to clump our weeklies together at the end of the Calendar section. We only keep about 1-2 months of weeklies in the planner at a time, to keep from the binder getting too bulky.


We use our weekly pages to track our ToDos, People to Call/E-mail, Places to Go and Social Media. But if those headings do not work for you, we also include a blank copy of this weekly so that you can fill in your own headings.

TO PRINT CALENDARS:

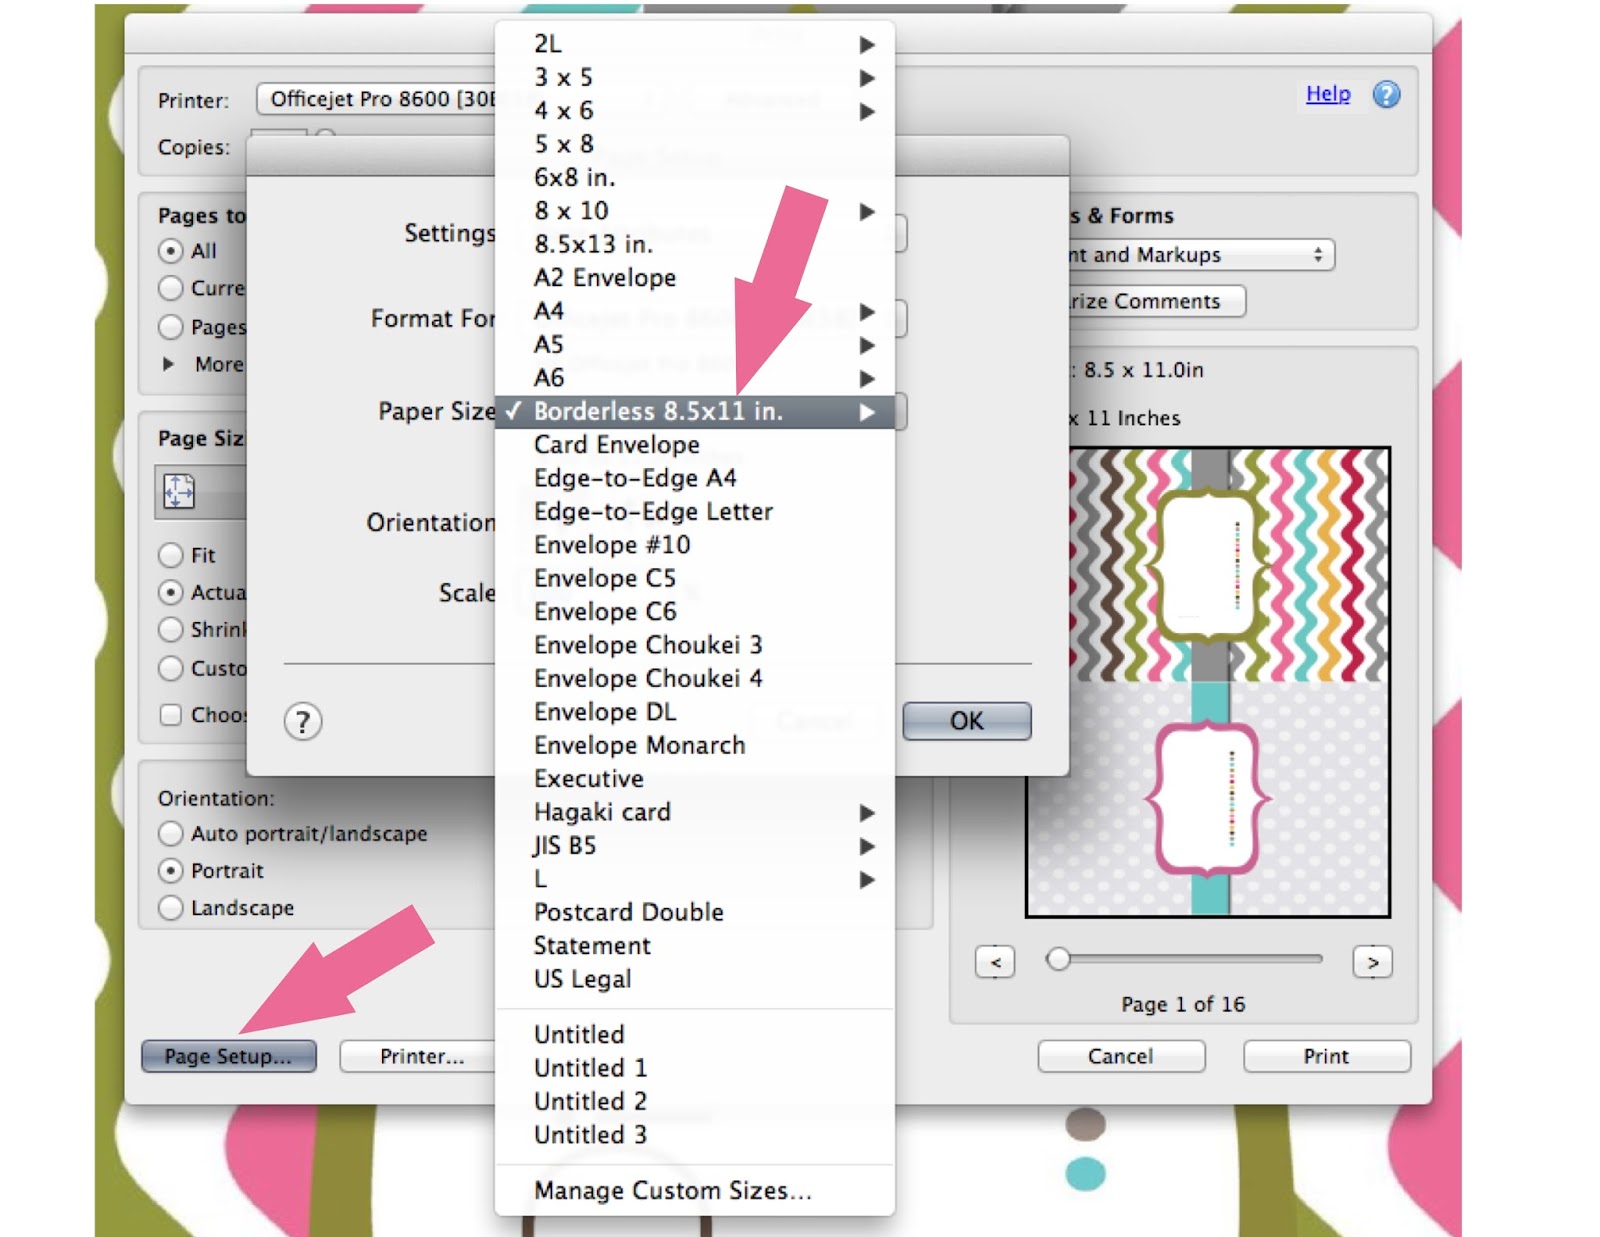
PLEASE NOTE: We recommend printing all of our planner pages "Borderless" so that the colors bleed to the edges. You can find this setting by clicking on the "Print Setup" button in Adobe:


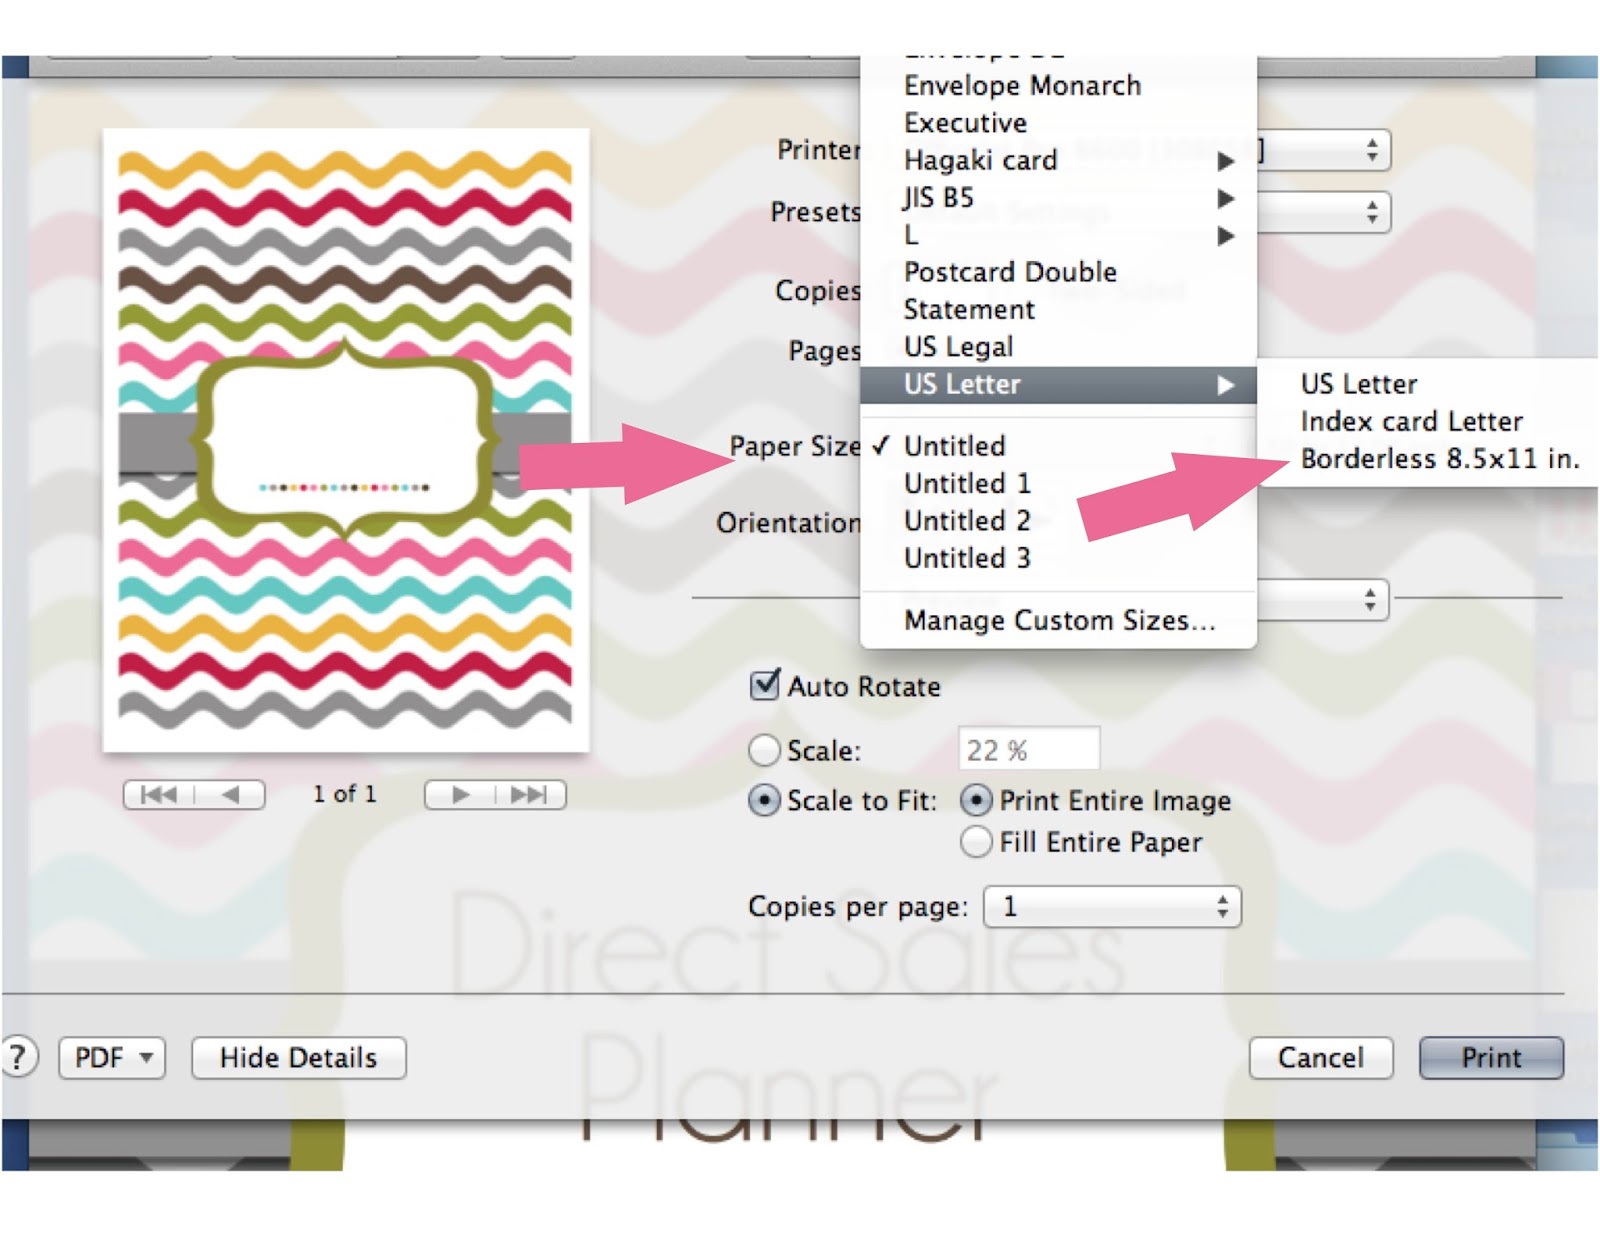
 Or the "Paper Size" drop-down menu in Mac Preview:

For our Large Planners, you have the flexibility to print your pages in any order you would like. We like our month to begin with the Monthly Goals & Tasks Page with a Notes page {as shown above}, which then flips to our first Monthly calendar. That will then flip to next month's Goals & Tasks page, which will then flip to the Monthly calendar. Repeat for as many months as you want to carry in your planner.

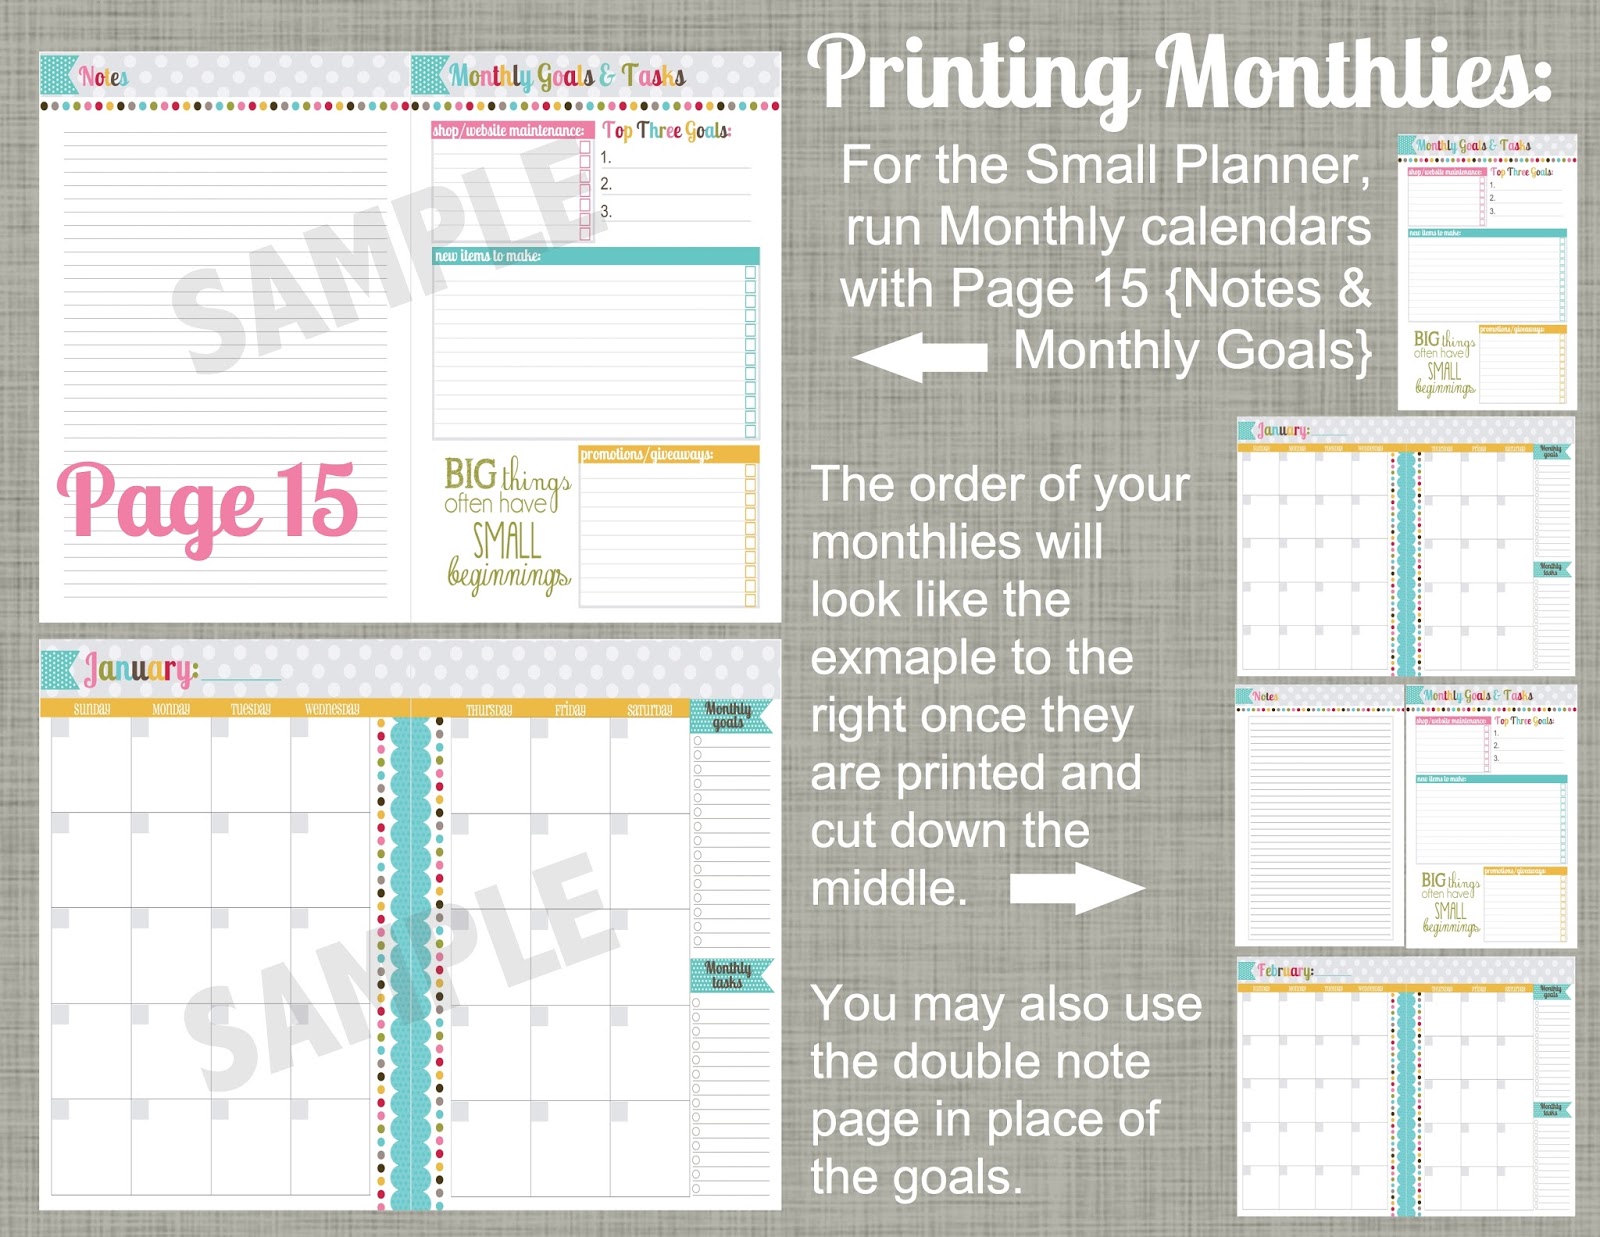
For our Small planner, we have this same order already set up for you. Because of the complexity of printing two planner pages on one sheet of paper AND have them work for front-to-back printing, they have to be in a very specific order. We take the guess work out for you and have designed a page that has the Monthly Goals & Tasks with Notes on one page so that you can simply run it on the back of each Monthly calendar. Here is a visual to help better explain this process:


For our Large Planners, you can choose to print the one-page Weekly of your choice front-to-back as many times as you like, or you can print your Weekly Page with a Notes page {which is what we have pictured above}.

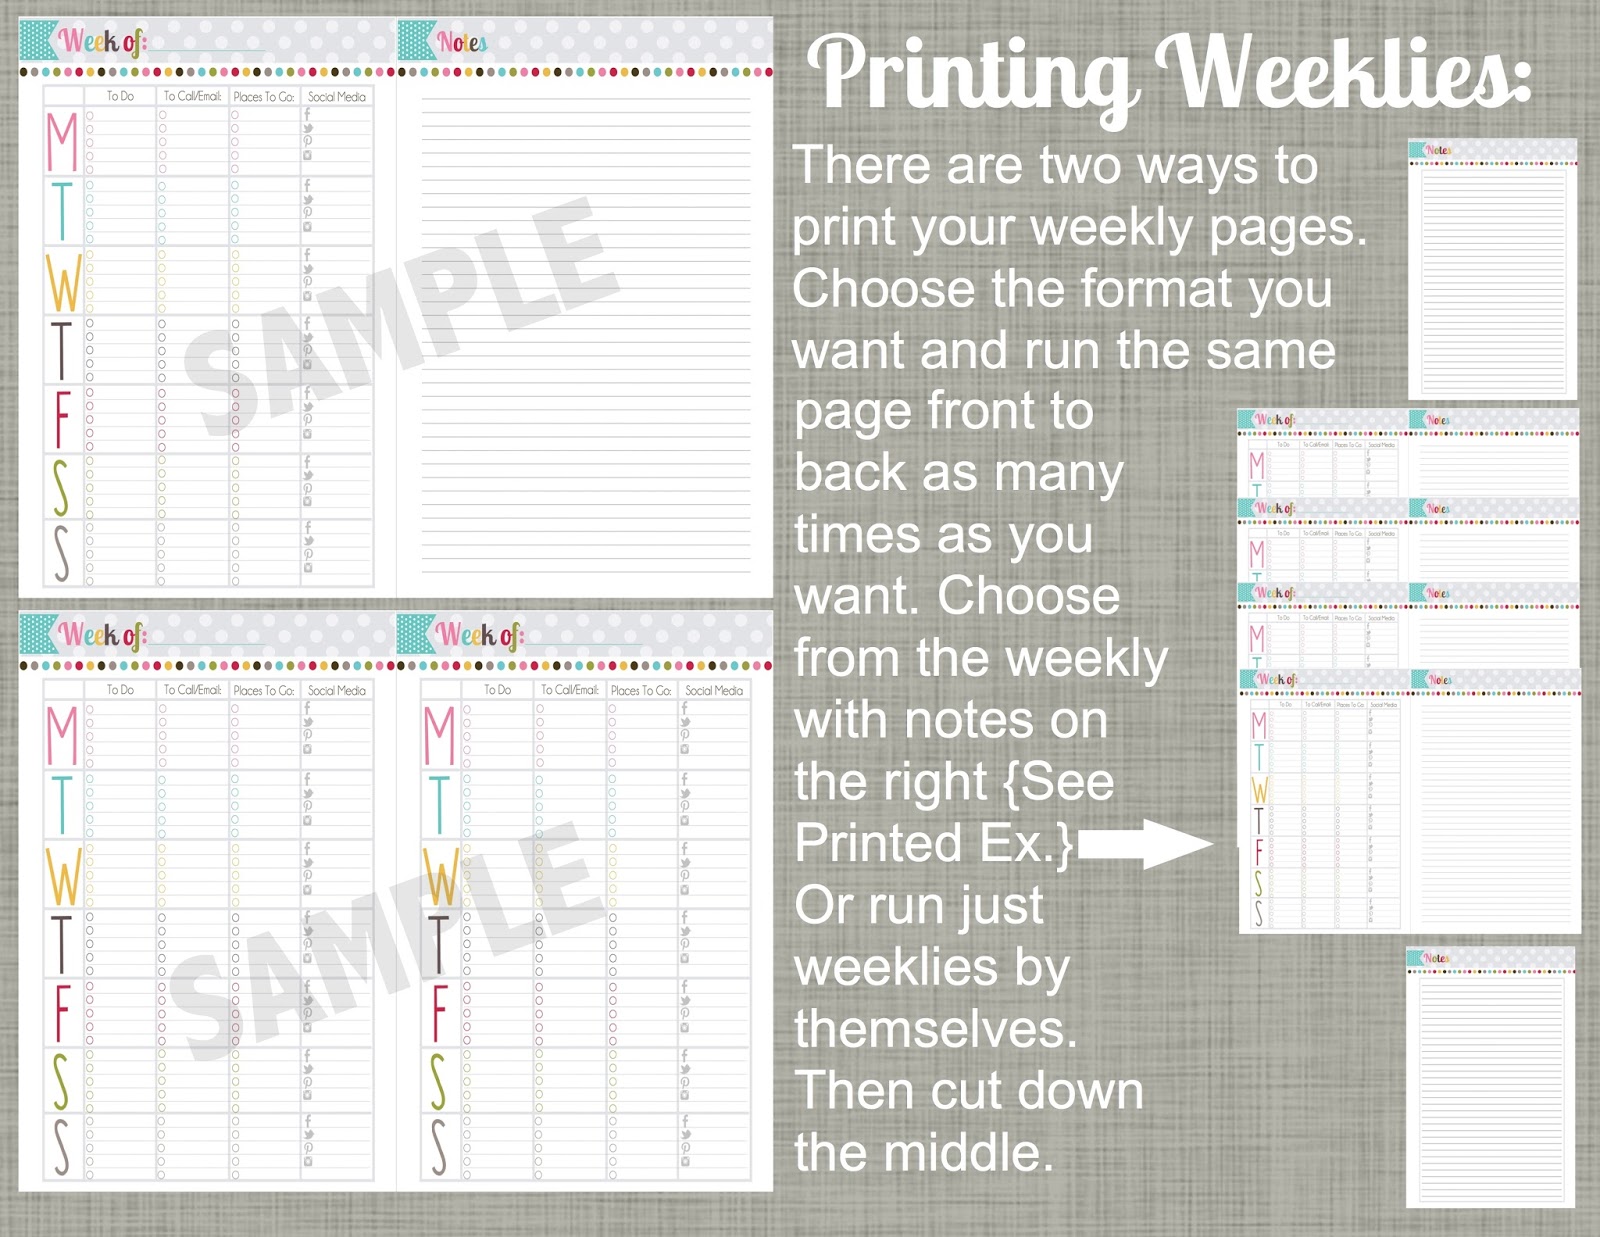
For our Small planner, we have designed the pages to give you both options for printing weeklies as well. You can select the Weekly Page with Notes so that you have a two-page spread {example below} or you can print just the double Weekly page back-to-back as many times as you would like.


PRODUCTS:

The next section in our planner is where we keep all of the trackers, notes and materials pertaining to our products. One of the most useful tools we use is the Product Cost Worksheet.


This worksheet will help you determine the cost of each item you sell by breaking down all of the materials, labor, fees it will cost you, in addition to the profit you hope to make.

This section also includes our Product Listing Tracker and our Supply Inventory Tracker.

TO PRINT THESE PAGES:

Again, select "Borderless" printing and simply run each of the pages front-to-back with itself for as many copies as you would like to keep in your planner. These instructions are the same for Large and Small.


CUSTOM ORDERS:

Our Orders section is where we keep all of our Custom Order Forms,


As well as our Custom Order & Shipping Trackers. Because my Etsy shop is all digital, I do not use the Shipping Tracker, but my mom relies heavily on it for all of her products. This is the great thing about this system…you can pick and choose what works best for YOUR business :-)

TO PRINT THESE PAGES:

Again, select "Borderless" printing and simply run each of the pages front-to-back with itself for as many copies as you would like to keep in your planner. These instructions are the same for Large and Small.

INVENTORY:

This section is incredibly helpful for keeping track of your supply inventory, as well as keeping an ongoing reminder of when items need to be reordered. Our Supply Inventory sheet does both for you.


FINANCES:

This is the most important section of our planner. Keeping accurate, detailed records of your expenses, mileage and sales is crucial when it comes to tax season and our planner has everything you need.

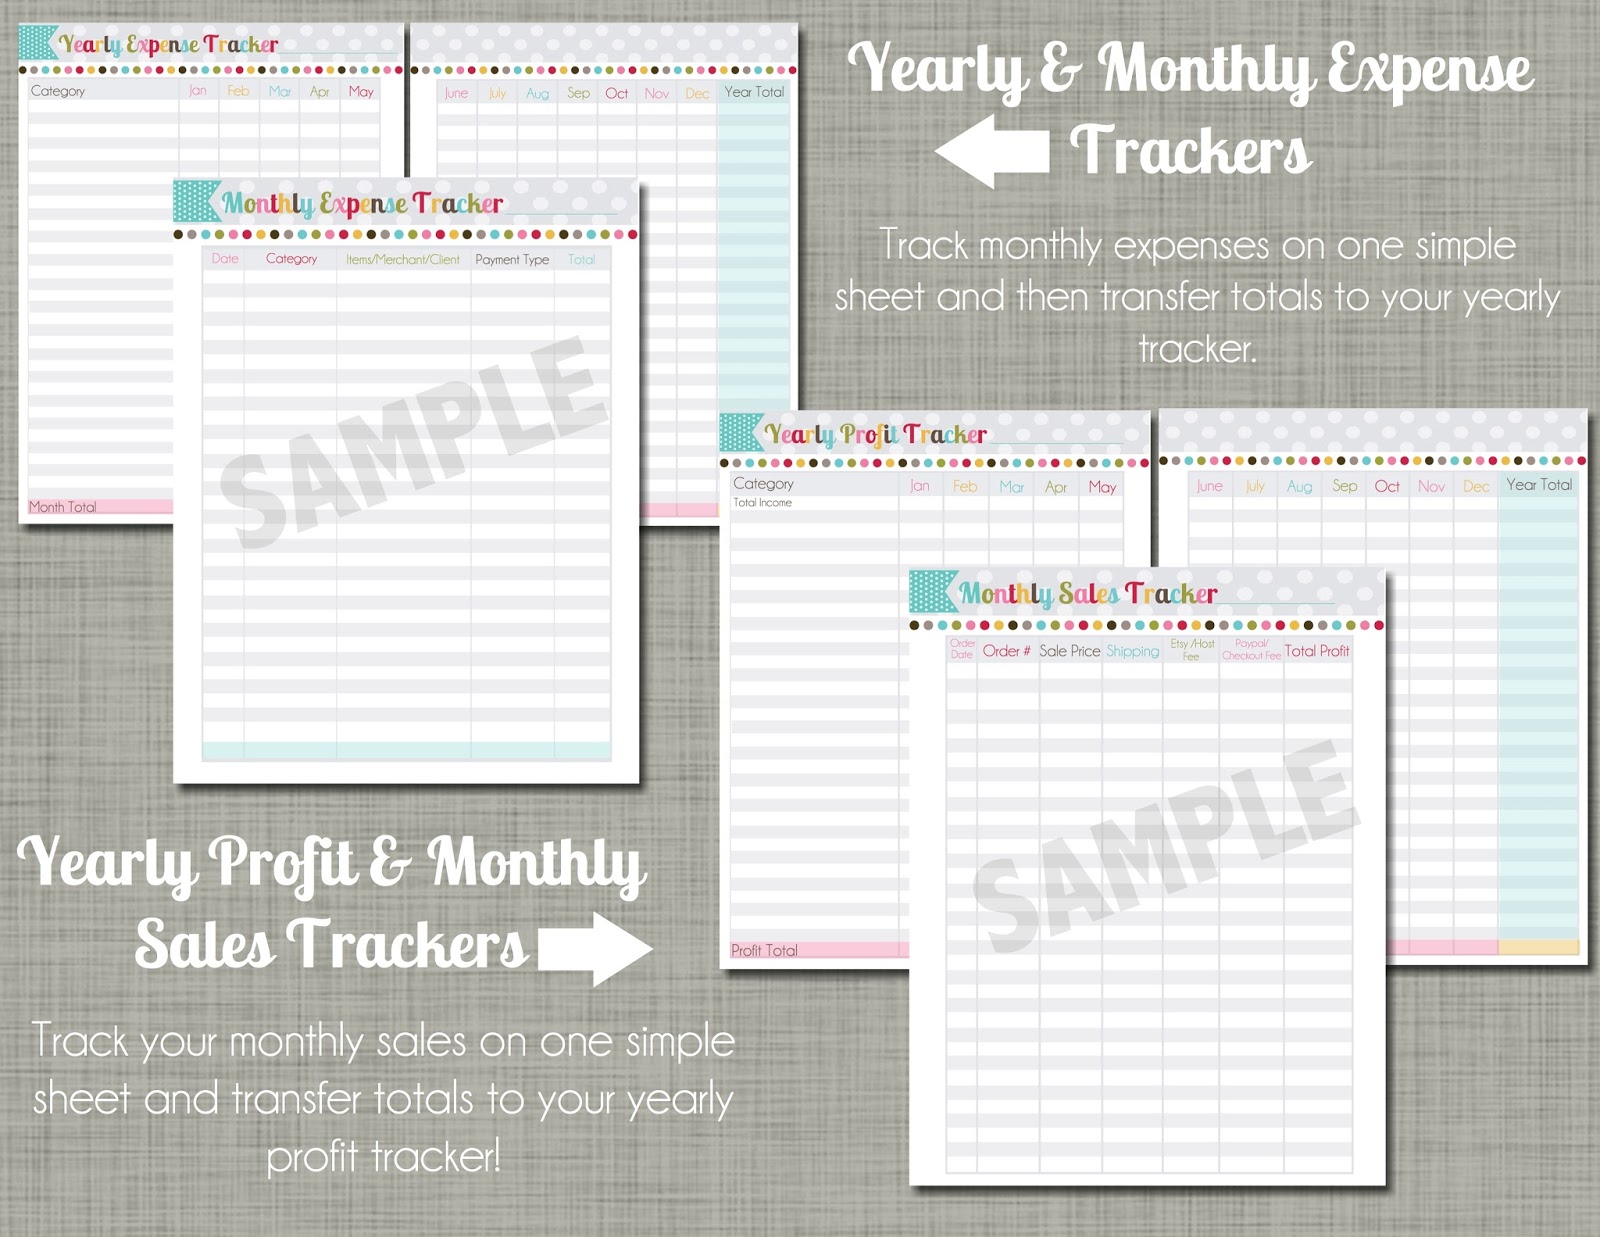
Our Finances section includes our Mileage Tracker, Monthly & Yearly Expense Tracker {with blank spaces so that you can write in your own categories} and Monthly & Yearly Sales and Profit Trackers {with blank spaces so you can write in your own categories}.


TO PRINT THE FINANCE PAGES:

The first step is always to select "Borderless"and then for the Mileage Tracker, simply print the same page on the front and back as many times as you would like. Some people use a new tracker for each month, others just keep a running total for the year.

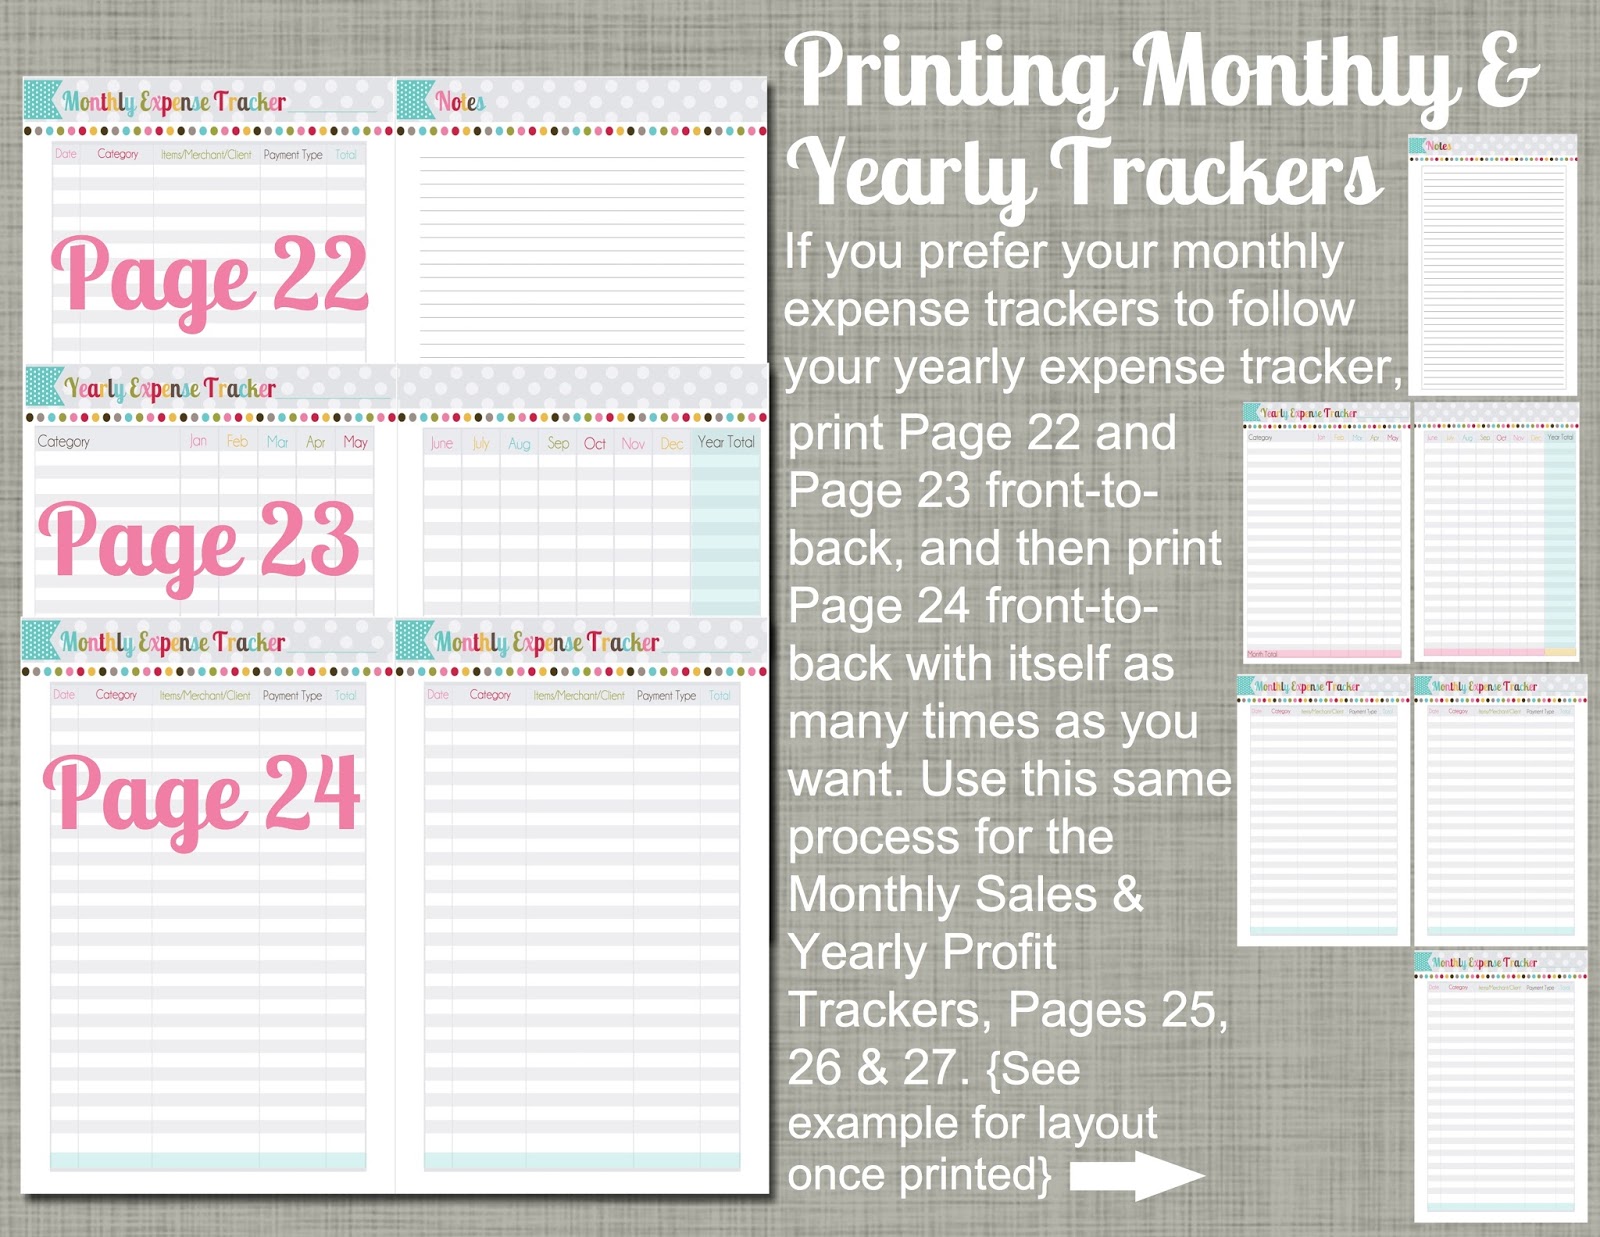
For the Monthly and Yearly Trackers, we prefer our Monthlies to follow our Yearly.

For the Large Planner, we recommend printing a Notes page to start the section, and then run the FIRST HALF of a Yearly Tracker on the back. Next, print the SECOND HALF of the Yearly Tracker with the coordinating Monthly Tracker on the back. Then, for the remaining 11 months of the year, simple run the Monthly Tracker back-to-back with itself.

For the Small Planner, we have arranged the pages for you to do the same thing. Please see this visual:


MARKETING:

This is the section where we track our Promotions and Giveaways and we have designed two different forms to help you out. We have a Promotions/Discount Tracker that will help you keep track of coupon/promotional codes, as well as the activation and expiration dates. We also have a very handy Giveaway form that will help you keep track of the blog or website hosting the Giveaway, when it starts and ends, the value of the prize, etc.


TO PRINT THESE PAGES:

Again, select "Borderless" printing and simply run each of the pages front-to-back with itself for as many copies as you would like to keep in your planner. These instructions are the same for Large and Small.

CONTACTS/NOTES/REFERENCE:

These last two sections of our planner serve as the catch-alls for everything else. It's a great place to store notes or project ideas, keep reference pages like our Passwords Tracker or 2014-2015 Yearly Overview. We have also included a great Contacts page in our set that you can us in any section of your planner.

********

OTHER PRINTING/ASSEMBLING TIPS AND SUGGESTIONS:

The wonderful thing about purchasing a Printable Planner is that you have the flexibility to make it your own. No more wasted pages you don't use and no more being stuck with a wire bound book that doesn't let you add your own materials. You have the flexibility to carry as much or as little as you want at one time, and reprint pages as you need them.

But with this freedom comes a little extra work on your part. To make the planner as flexible as possible, we keep the pages individual which means it isn't as simple as clicking "Print" on your screen. You will need to spend time determining what you want to print and how many pages you want of each item to get you started. You ARE allowed to use printing services for your planner, but beware that they will need YOU to tell them how you want the planner put together.

But we promise…it is worth the time and effort to have a planner that you truly love and that you will commit to using every day. So before we end this instructional post, we want to offer a few other printing tips to help you out.

* We recommend using 24-28lb paper. It is thick enough to write without bleeding through the pages, but it is thin enough to keep your planner from exploding :-)

* We recommend printing your cover page with heavy duty card stock if possible. This will keep it from wearing throughout the year.


* Many printers have a default setting when switched to "Borderless." It assumes you are printing a photo or image and will typically choose "Photo Paper" as your paper type. This is only a problem because your printer will use 3 times as much ink if it thinks it is printing on photo paper. Be sure to change this setting EVERY TIME you switch to "Borderless" or print a new page.

* IF YOUR FILE FOR THE SMALL PLANNER LOOKS OUT OF ORDER…it's because it is. However, it is in the correct order for two-to-a-page/front-t0-back-printing. The order of your pages will make sense once they have been printed front-to-back AND cut down the middle.

* We have tried to our best to make these instructions as comprehensive as possible, but if you still have other questions, please don't hesitate to contact us at ThePolkaDotPosiePrintables{at}gmail{dot}com.

We hope you love this planner as much as we do!!!!

Friday, February 14, 2014

We Heart Printables Week {Day 5}: Printable Lovie Coupons

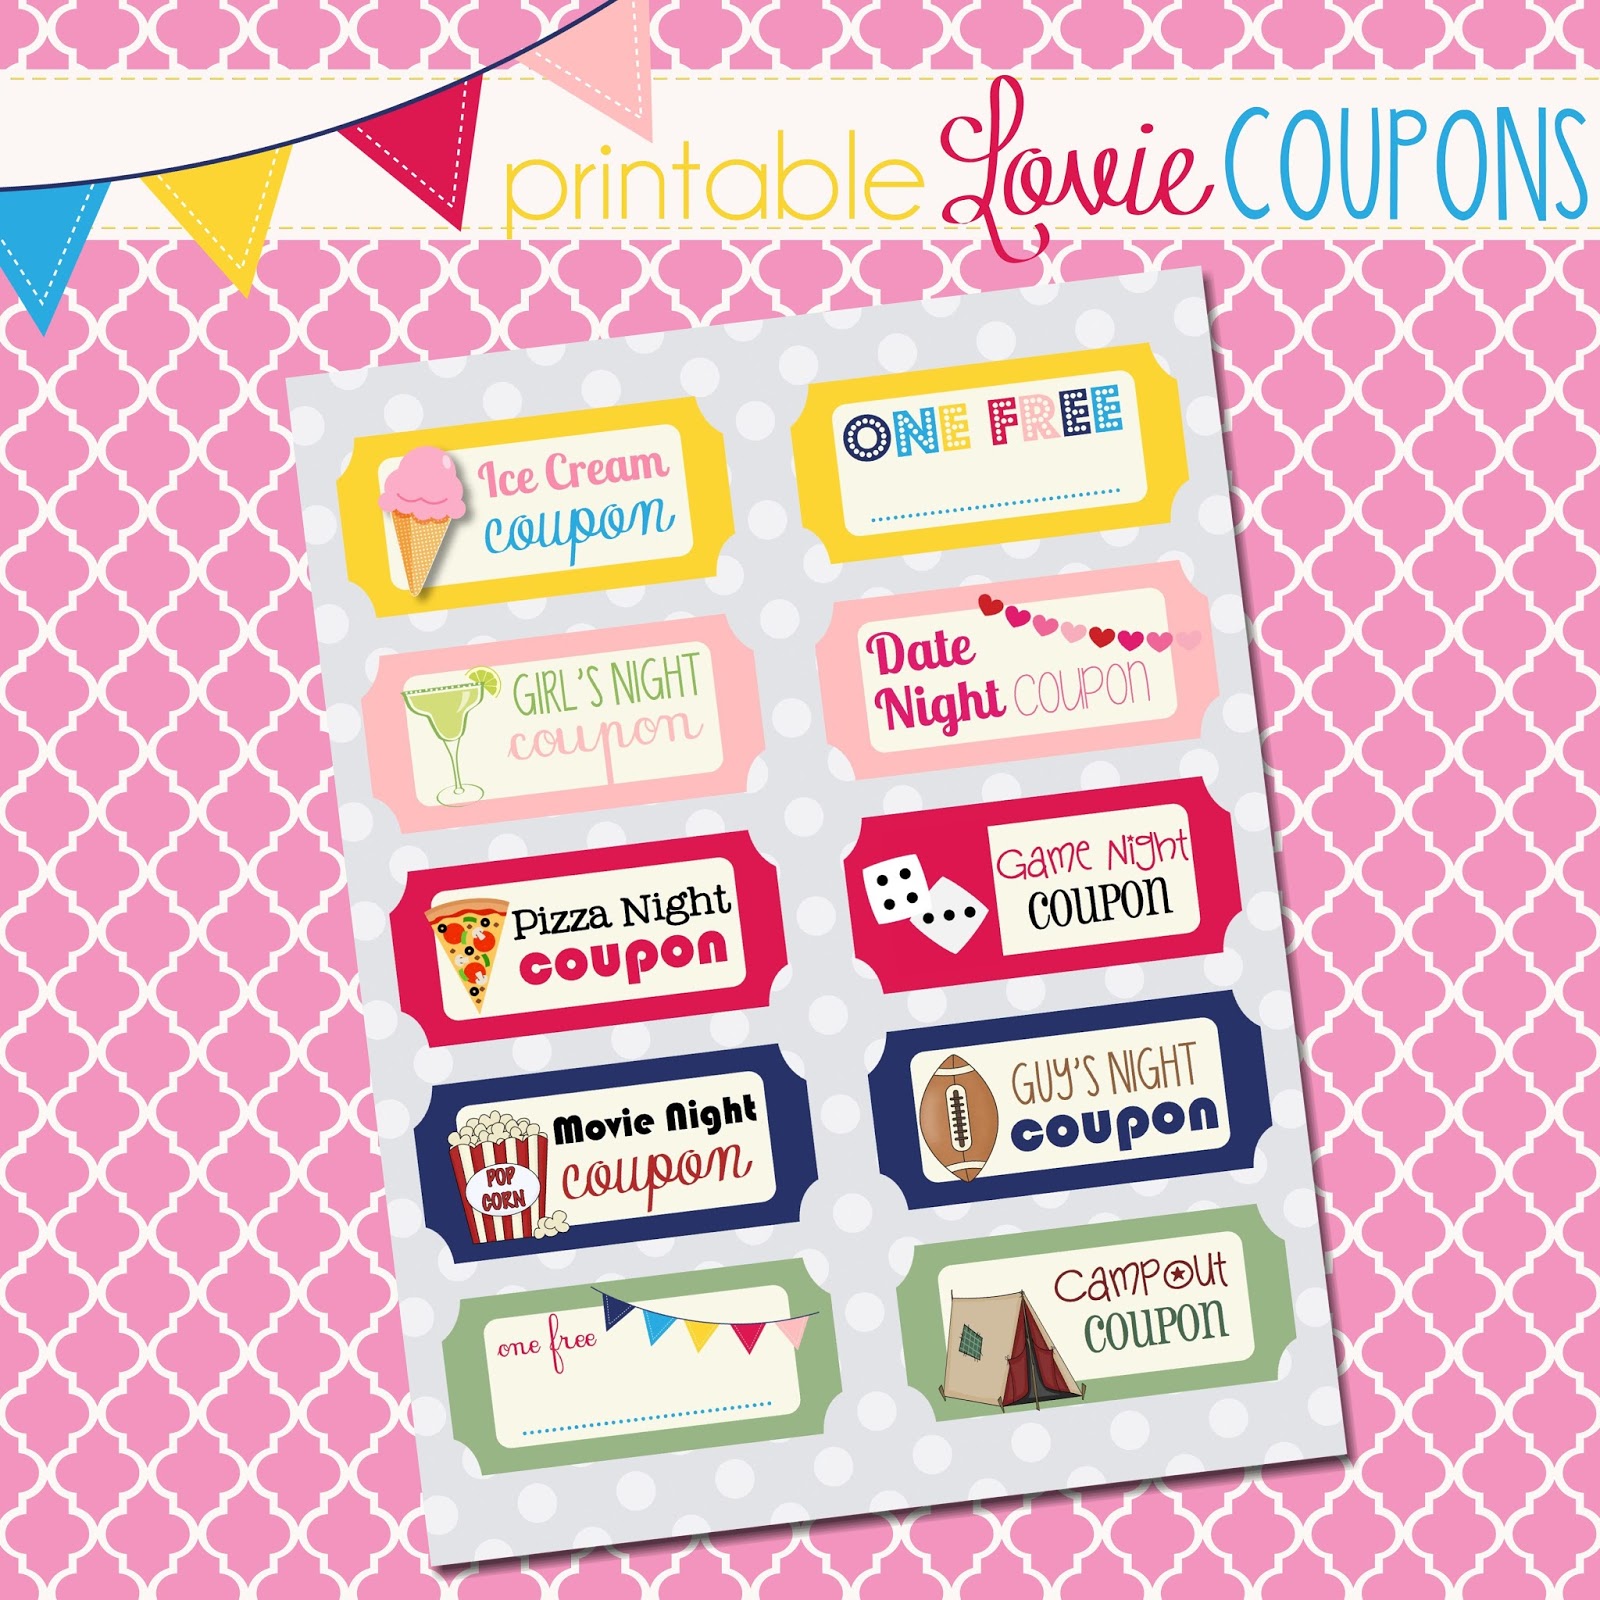
Happy Valentine's Day to all you lovies out there!!! Today's freebie is something we hope you will be able to use all year long. We all know how busy life gets and one of the best things about Valentine's Day is that people actually make time to spend with the people they care about. Well we think that effort should be made all year long so here are some fun Lovie Coupons that you can share with your kids, your friends and your sweetheart!!


Surprise them with an Ice Cream date or Movie Night, watch the stars in your backyard with a Campout, cash in on your wife or hubby and have a GIRLS NIGHT OUT! Okay…I guess you could surprise your hubby with a Guy's Night Out too :-) We've also created two blank coupons that you can fill in with whatever you want! One free day of NO CHORES! One free day of endless cuddles! Whatever you want to surprise your lovies with :-)

We really hope you have enjoyed our freebies this week!! Thanks so much for celebrating with us and following along :-)

Happy Valentine's Day!!

Thursday, February 13, 2014

We Heart Printables Week {Day 4}: Valentine's Day Cards, Treat Tags & Cupcake Toppers

Calling all last-minute Valentine's Day shoppers!! Are you still in need of cute, inexpensive Valentine's Day cards or treats ideas?! If so…we can help you out with today's freebies!!!


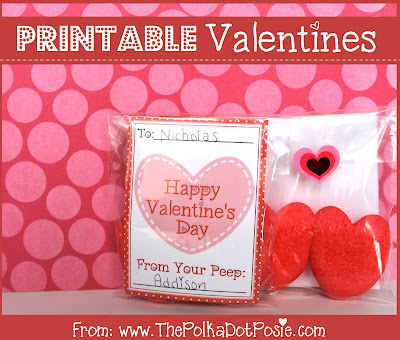
First up, we have these adorable printable Valentine's Day cards!


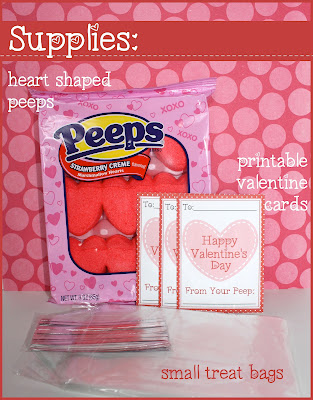
Putting together these "Happy Valentine's Day From Your Peep" treats are super simple and SUPER CHEAP!! Here's what you need:


You can find these packages of Peeps pretty cheap right now and the small treat bags come in sets of 50 and 100 at Michael's and JoAnn's (both stores always have a 40% off one item coupon too). As for the Valentine's Cards, just pick up a pack of card stock and download the printable cards here! One sheet will print 6 cards and I tried to take it easy on the ink :-)

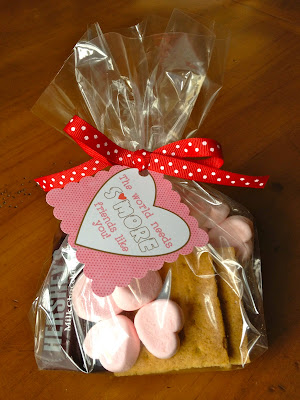
And of course, let's not forget about the teachers!! We've made these the last 2 years for my daughter's teachers and they are always a HUGE hit. You can download this treat bag tags here.


And finally, if you are looking for a simple "Happy Valentine's Day" treat bag tag OR cupcake toppers, these 2" tags are just what you need! You can download them here.


We hope you are enjoying all of our freebies this week! We have a very special one saved for Valentine's Day tomorrow so be sure to stop by!

Wednesday, February 12, 2014

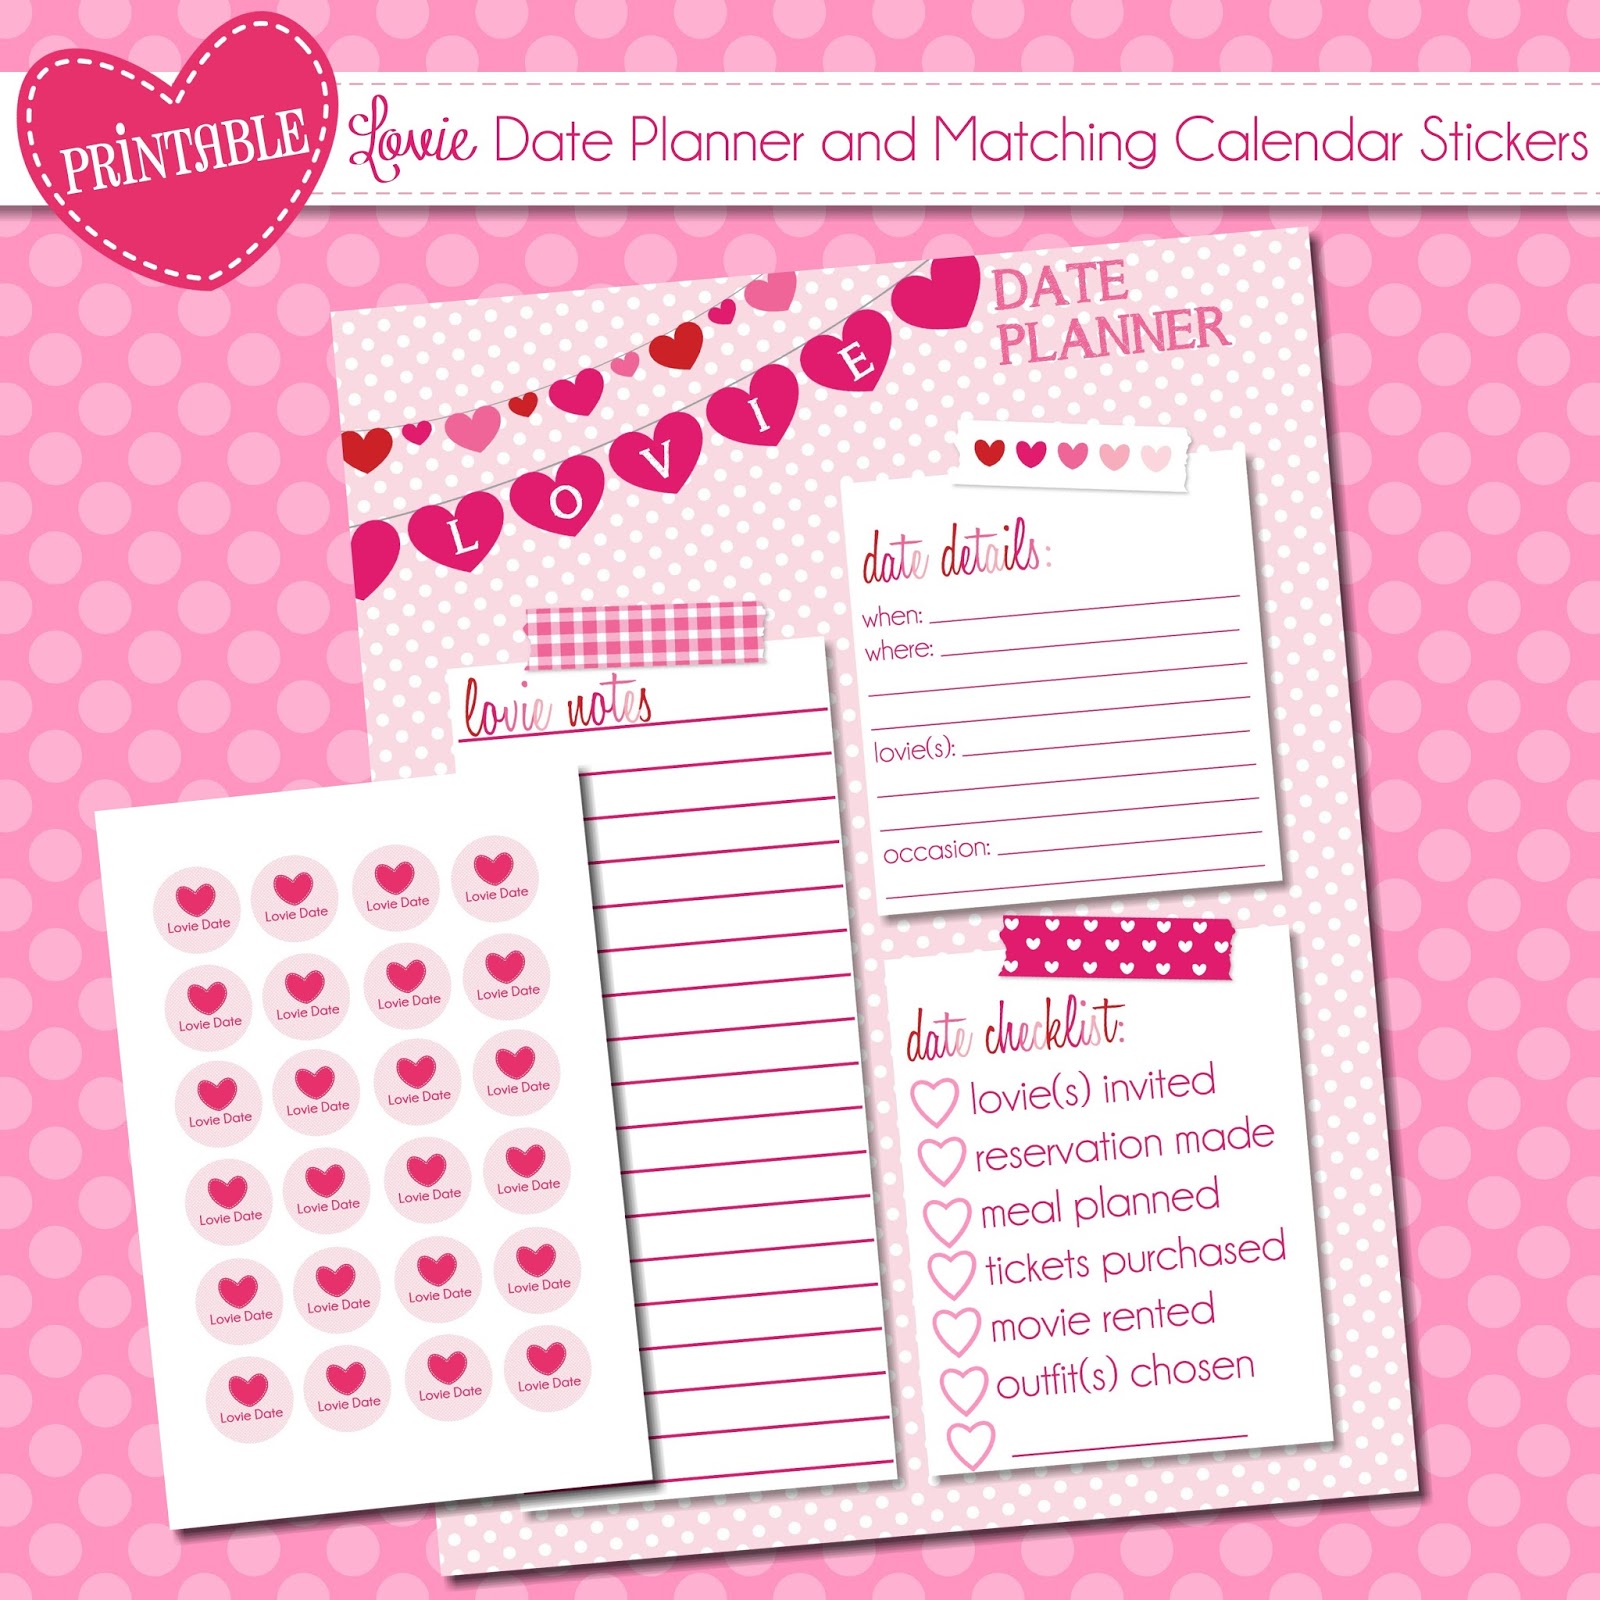
We Heart Printables Week {Day 3}: Lovie Date Planner & Matching Calendar Stickers

Valentine's Day is about celebrating ALL the lovies in our lives. Spouses, significant others, kids, grandparents, friends, pets…they all make this day special. So whether you are staying in for a family movie night or splurging on a romantic dinner…make sure you organize your plans with our fun Lovie Date Planner and Matching Calendar stickers!!


These pages are fun and festive and can be used ALL YEAR LONG to schedule and plan dates with your hubby, your kids or your girlfriends.

The planner page comes in three sizes:


PRINT INSTRUCTIONS:

Be sure to print the Lovie Date Planner "borderless" for best alignment. You can find other helpful print instructions for each of these planner sizes by clicking on the "Planner Pages" tab at the top of our blog.

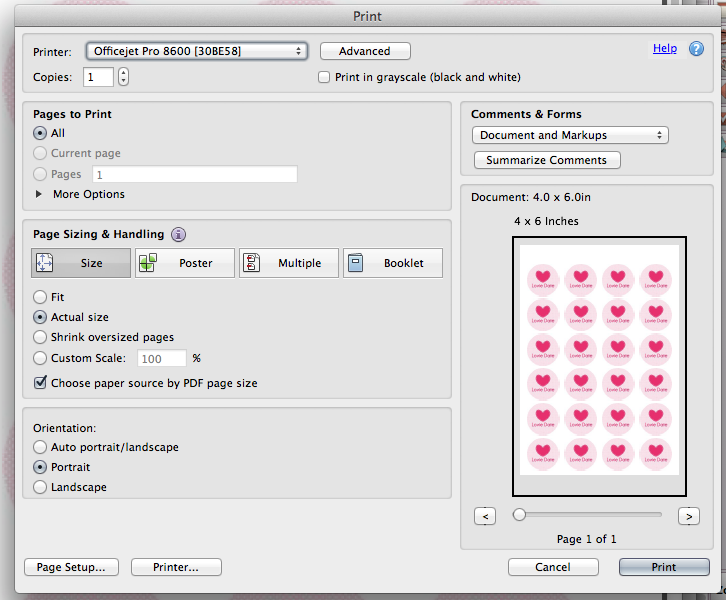
For the Lovie Date Calendar Stickers, you will want to use Avery Labels #5408. You can find these at Staples and other office supply stores near price stickers {they are not with the other full sheet labels}. 

Be sure to view the file with Adobe and choose the "Actual Size" option and check the box for "Choose paper source by PDF size."


We hope you enjoy using this fun new planner page and stickers and we hope you schedule LOTS of lovie dates in 2014 :-)

Tuesday, February 11, 2014

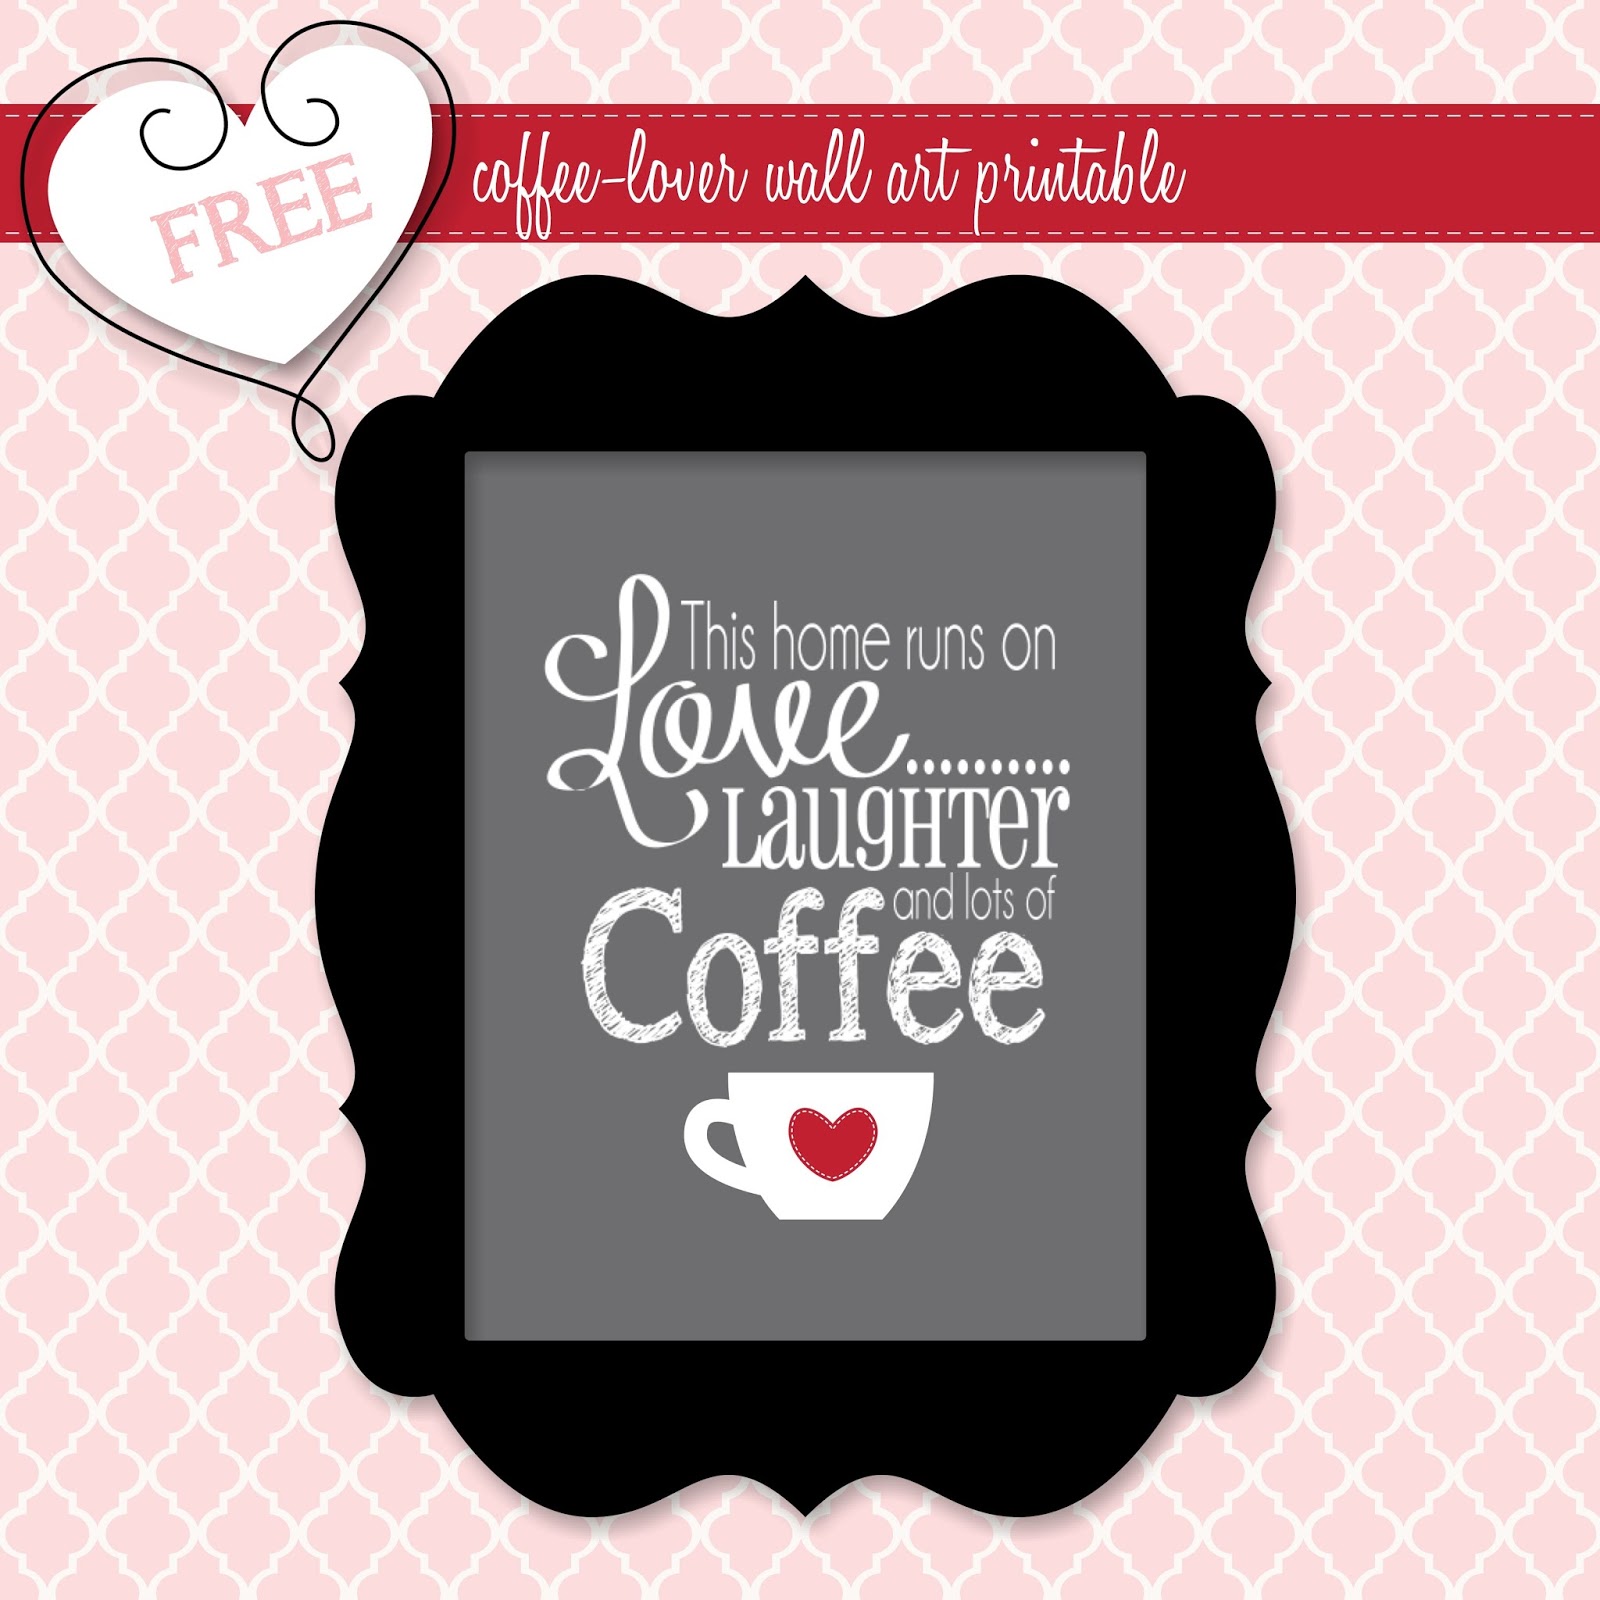
We Heart Printables Week {Day 2}: Coffee-Lover Wall Art

If you heart coffee as much as my mom and I do, then I know you will LOVE {and agree with} this printable wall art sign!


Hang it in your kitchen in an 8x10 frame, set it next to your coffee maker in a 5x7 table top frame or just tape it to your fridge :-)

This printable will also make a GREAT Valentine's Gift for the coffee-lover in your life so be sure to download it today :-)

And stay tuned for tomorrow's Freebie…this one is for my planner-lovers!!

Monday, February 10, 2014

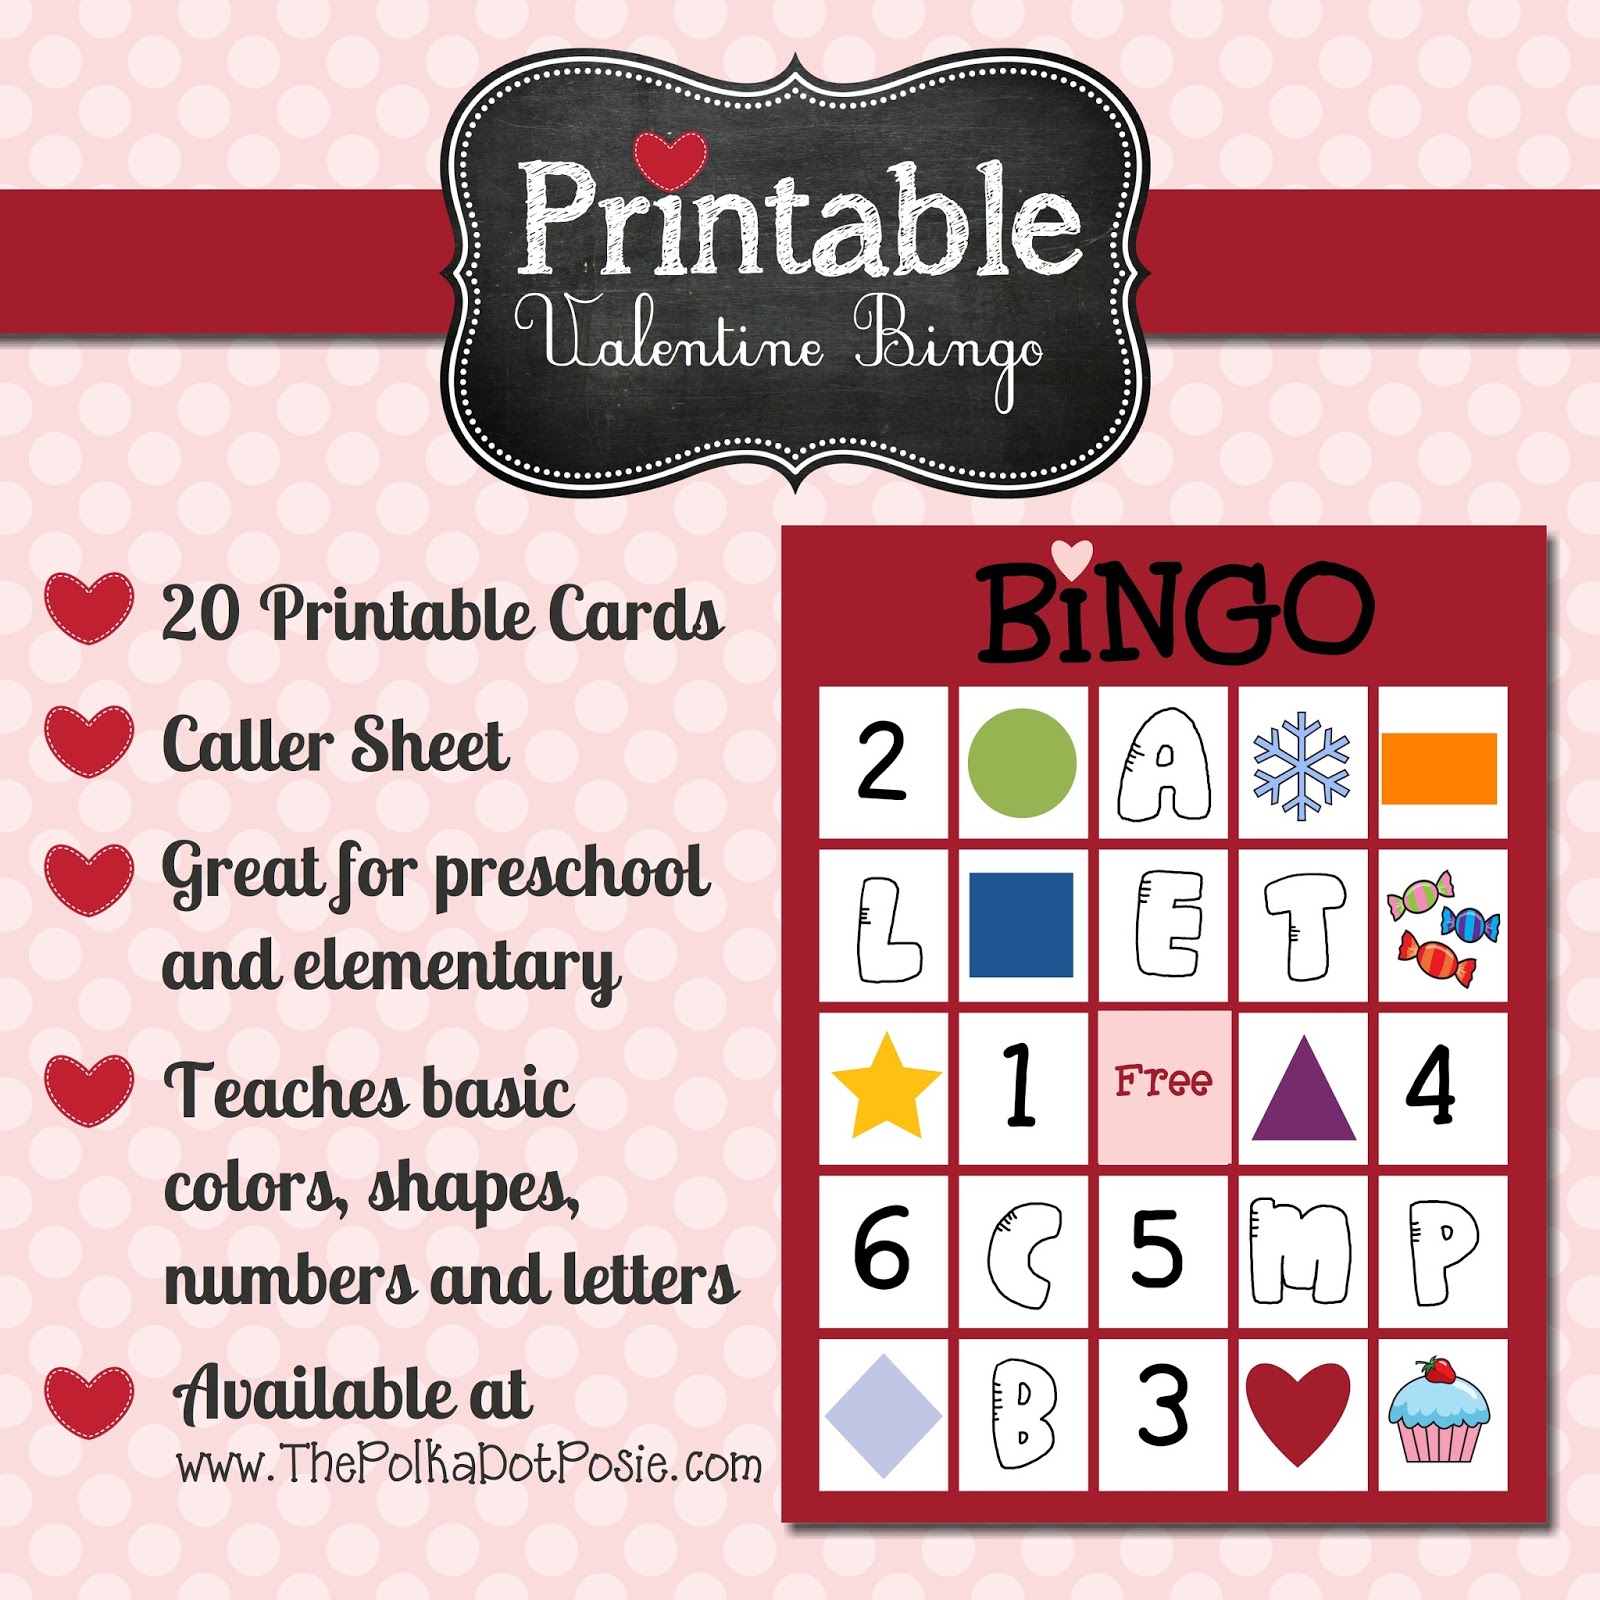
We Heart Printables Week {Day 1}: Printable Valentine Bingo

Here at ThePolkaDotPosie…we LOVE Valentine's Day. And our fabulous customers. And printables.

So we thought what better way to show our love and appreciation this Valentine's Day than with 5 DAYS OF FREEBIES!!!!! Our first freebie of the week is one of the first printables we ever offered…our Printable Valentine Bingo!

If you are in charge of a class party this week, or if you are looking for a fun activity to do with your kids or grandkids at home, be sure to download this fun set.


We recommend printing our Valentine Bingo on cardstock or heavy paper for durability, and if you have access to a laminator…that's even better :-)

You can use Hershey kisses, conversation hearts or marshmallows as markers. Or, if your school doesn't allow candy, you can also use a heart-shaped punch and make markers out of paper.

We hope you and your kids enjoy this fun holiday game!! And be sure to stop back every day this week for more printable fun! Coffee lovers…the next printable is for you!!